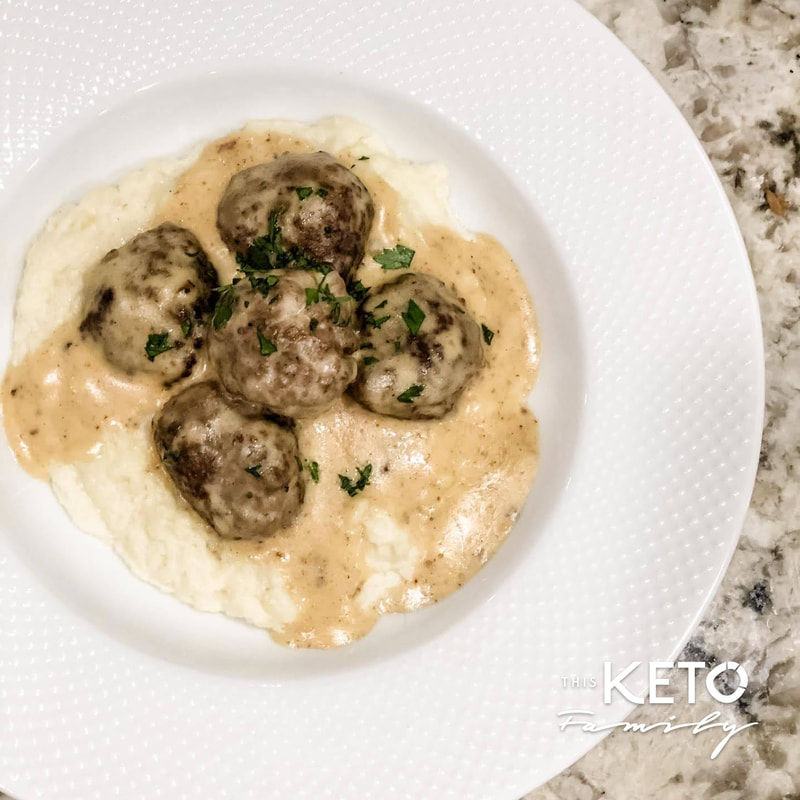
 Have you ever wondered why the Swedish meatballs they sell at Ikea are so darn cheap? I've always wondered that but never really bothered to investigate (if anyone knows, email me because I'm curious but not curious enough to dig on my own, Ha!). So I hadn't been to Ikea in ages but the other night I needed a recipe that would be kid friendly—since my daughter has a school friend over—and I had an extra head of cauliflower that needed to be made. Swedish meatballs! I knew this was the ticket. I love the sweetness that comes from the nutmeg and all spice in this recipe. Most of the time I stick to my go-to recipes and that I find myself in a ingredient vortex. This recipe is a nice change of spices which really offered a nice change of pace to our normal weekly meals. The best part? All the kids ate it up and that is the BEST FEELING as a mom. Serves: 4-6 People Meatball Ingredients: 2 lbs ground beef 1 egg 1/2 cup parmesan cheese, grated 1 onion, diced 2 tablespoons avocado oil, divided 1/4 teaspoon all spice 1/4 teaspoon nutmeg 1/4 teaspoon salt 1 tablespoon fresh, chopped parsely 1/2 cup panko pork crumbs Cream Ingredients: 1 1/2 cup heavy whipping cream 1/2 cup beef stock (or water) 1 tablespoon butter 1 cup parmesan cheese, grated 1 cup gouda cheese, grated (or any other milder white cheese. Don't use any cheddars. Or just double the parmesan.) 3 teaspoons Worcestershire sauce 1/2 teaspoon xanthan gum 1/2 teaspoon avocado oil Directions:
Serve Swedish meatballs with a side of veggies or over Mashed Cauliflower. Bon Appetit! Follow us on Social Media | Did you try the recipe? Tag us! @thisketofamily This Keto Family is a participant of the Amazon and other affiliate marketing programs, which means we may get paid commissions on editorially chosen products purchased through our links to retailer sites.
0 Comments
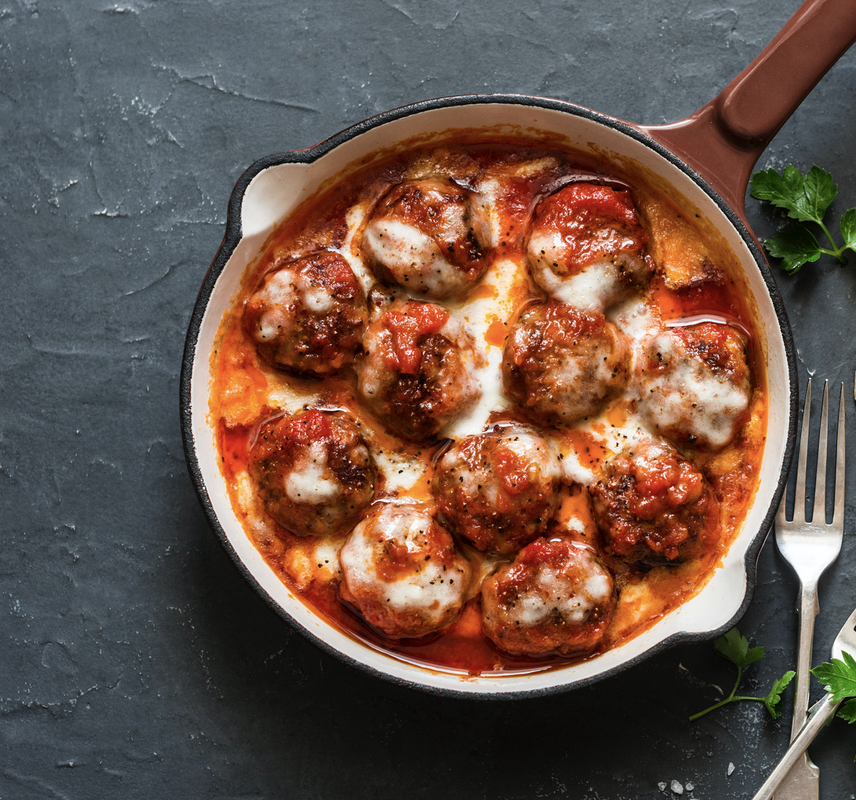 What is it about meatballs that make them so comforting and fulfilling? They're also compact and fun so the kids love them. I also love them because I can hide things in them LOL. Before we were Keto I used to hide a tom of veggies in my meatballs and meatloafs because otherwise the kids wouldn't eat them. Now my views on nutrition have so drastically changed. I still hide some veggies (old habits die hard), but I also add some beef liver (sometimes) or beef liver supplements (shhh!) These keto meatball versions include extra parmesan cheese mixed inside the meatball as well as some pork panko and almond flour as binders. They always come together to nicely and are juicy, filling and delicious. Ingredients: 2 pounds ground beef 2 tablespoon beef tallow, divided (or Kerrygold butter) 1 onion, diced 1/3 cup pork pankos (pork rind "bread" crumbs) 1/3 cup grated parmesan cheese 1/8 cup almond flour 2 eggs 1 teaspoon garlic powder 1 teaspoon onion powder 1/2 teaspoon salt and pepper 28 oz Rao brand marinara sauce 1/2 teaspoon Italian seasoning 3 oz fresh mozzarella cheese Directions:
Follow us on Social Media | Did you try the recipe? Tag us! @thisketofamily This Keto Family is a participant of the Amazon and other affiliate marketing programs, which means we may get paid commissions on editorially chosen products purchased through our links to retailer sites.
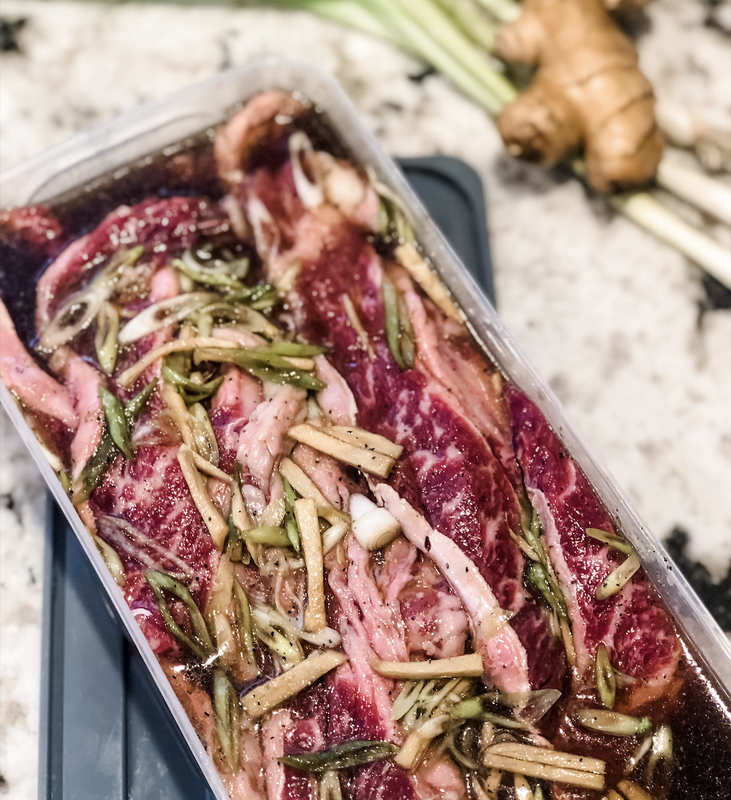
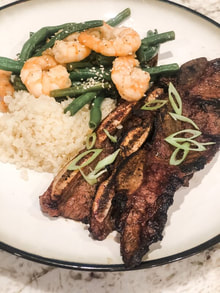
Ingredients (Marinade): 5 pounds Korean style beef short ribs 1/2 cup liquid aminos 1/2 cup water 2 tablespoon brown Swerve 1 tablespoon Yacon syrup 1 tablespoon avocado oil 2 tablespoon rice wine vinegar 2 stalks green onions sliced 2 inch piece ginger, sliced 1 teaspoon black pepper Directions:
Follow us on Social Media | Did you try the recipe? Tag us! @thisketofamily This Keto Family is a participant of the Amazon and other affiliate marketing programs, which means we may get paid commissions on editorially chosen products purchased through our links to retailer sites.
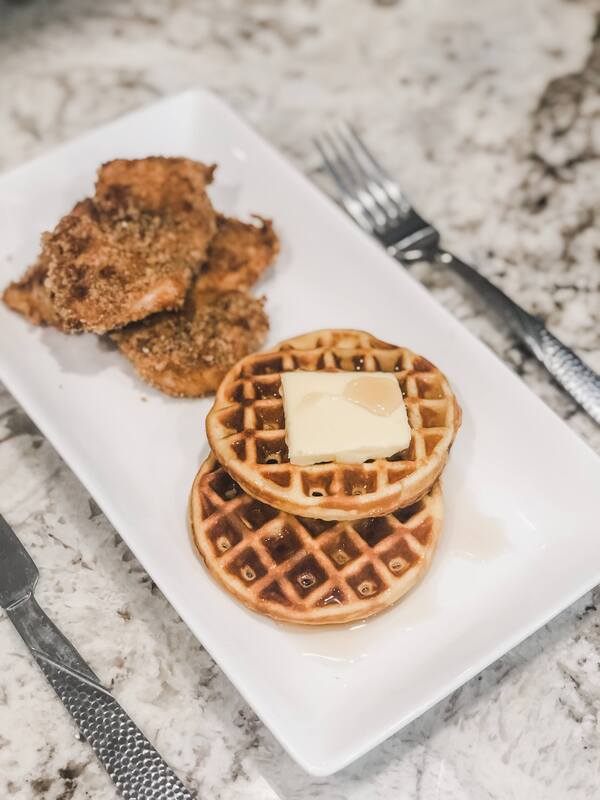
Chicken and waffles was a meal I ordered once in a blue moon because it always felt gluttonous and unhealthy. A "normal" standard American Diet version of this meal easily boasts 306 grams of carbohydrates and upwards of 123 grams of sugar; not even counting the sugar and carbs from any syrup you'd slather on top--YIKES!! (These nutrition facts I pulled from a popular restaurant's chicken and waffle menu version, eek!)
My keto version is about 6 grams of net carbs for an ENTIRE SERVING (2 pieces of chicken and 2 waffles PLUS keto maple syrup!) I no longer feel guilty eating this meal and neither should you. It's also become a favorite in my household with my kids. I also opted to use my Cosori air fryer to cut out any further polyunsaturated fats that would have been used if I deep fried the chicken. More on polyunsaturated fats and MegaTrans fats in a separate blog post. For now, know that the air fryer option still produces a crispy crust while keeping the inside moist and flavorful. Bon appetite! Ingredients: 2-3 pounds skinless chicken thighs 3 cups pork pankos (pork rind "bread" crumbs) 1 cup shredded parmesan 1 cup almond flour 3 eggs, beaten 1 teaspoon Pink Himalayan sea salt 1 teaspoon garlic powder 1/2 teaspoon paprika 1/2 teaspoon onion powder 1/2 teaspoon pepper Waffle Recipe Directions:
Make it with our current product favs
Follow us on Social Media | Did you try the recipe? Tag us! @thisketofamily
This Keto Family is a participant of the Amazon and other affiliate marketing programs, which means we may get paid commissions on editorially chosen products purchased through our links to retailer sites.
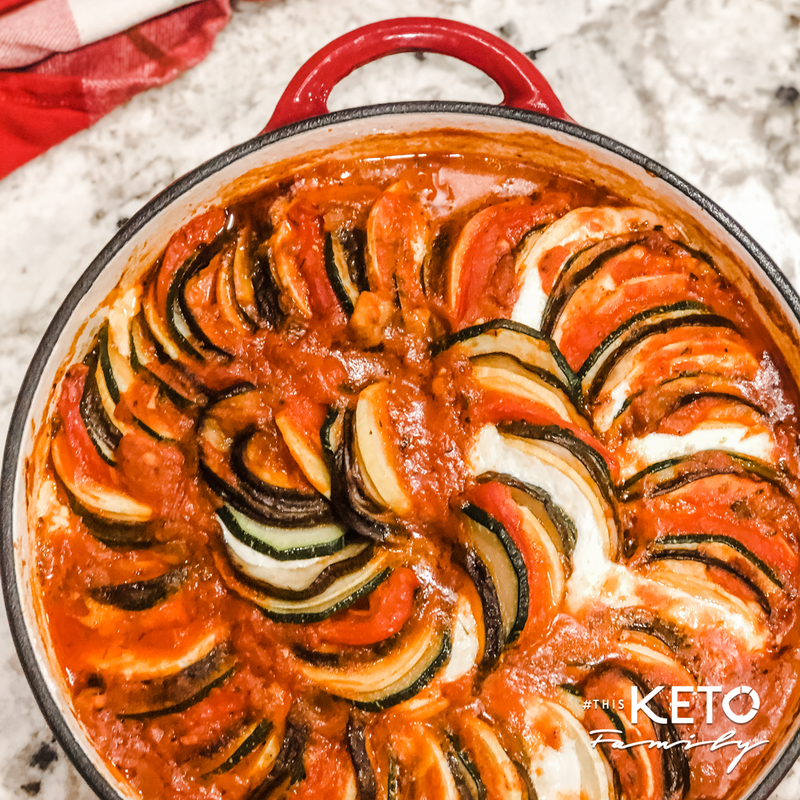
Several months ago when our vegetable garden was producing at its peak, I had zucchini and yellow squash quite literally coming out of my ears. My family quickly got tired of sautéed squash at every meal. I even purchased a spiralizer so that I could dress up the same vegetable in a different way (and trick the babes into eating it yet again ha!)
On night I asked my keto community for ideas and someone suggested ratatouille. I knew what it was but I honestly thought it would be so hard and complicated that I never endeavored to do it. Wow, was I wrong! The hardest part is cutting the veggies, but with the correct tools, it was a snap. I dug out my mandoline (that I received as a present and never used) and got to work. Slicing done in less than 5 minutes. Layering the veggies, 10 minutes (maybe). Baking the ratatouille was 30 minutes. The result? A visually stunning dinner that also tastes amazing, quite literally like it came from an expensive Italian restaurant! Another plus...Leftovers! This tastes even better the next day or repurposed as a soup! I hope you enjoy this recipe as much as we do. Serves: 6-8 Ingredients: 2 large zucchini, sliced thinly 1/16 inch thick (~1 mm) 2 large yellow squash, sliced thinly 1/16 inch thick (~1 mm) 2 large eggplants, sliced thinly 1/16 inch thick (~1 mm) 1 package fresh mozzarella cheese log 1 jar roasted red bell pepper, cut into strips 1 jar Rao’s Marinara sauce (24 oz) 1/2 cup parmesan cheese, grated, divided 3 tablespoons olive oil 1/2 teaspoons garlic powder 1 teaspoon Worcestershire sauce Salt and pepper to taste Basil for garnish Directions:
Make it with our current product favs
Follow us on Social Media | Did you try the recipe? Tag us! @thisketofamily
This Keto Family is a participant of the Amazon and other affiliate marketing programs, which means we may get paid commissions on editorially chosen products purchased through our links to retailer sites.
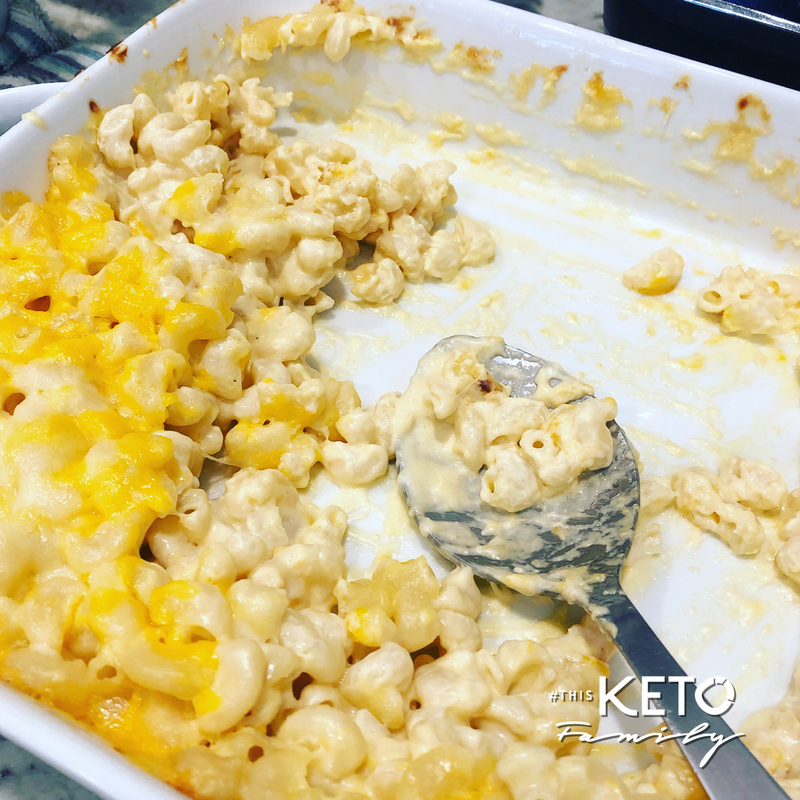
When I first transitioned to Keto, the one thing I missed the most at first was pasta. The one thing my kids still ask for on a regular basis, especially my oldest daughter, is....pasta. Now if a mom in her mid-30s was having a hard time giving up pasta when going keto, what could I expect from my then 6-year-old daughter?
I tried everything to substitute for pasta--black bean pasta (which was beans I know, but it only had 8g of Carbs per serving and for my low carb kiddos, that was good enough for me), zucchini noodles, and shirataki noodles (we've tried every single brand and the best is my opinion is Well Lean). I even made my own gnocchi pasta recipe (which satisfied a pasta fix, but was not the same as elbow macaroni). Everything worked out OK, but just never compared to the real deal. I get it, pasta is chewy and has a certain bite to it that until now, no real keto product could rival. Enter the Great Low Carb Bread Co.! They carry an AMAZING line of low carb and gluten-free pastas and breads for purchase. The reason we love GLCBC is because they focus on using the highest quality ingredients such as almond flour, flax meal, oat fiber and olive oil. The net carbs are decent (this particular recipe net carbs is 7g net carbs per serving), so if you are careful with your carb intake for the rest of your day, then this can be a nice treat here and there. If you ever need keto comfort food, this is it. My 4-cheese version is such an easy recipe and delivers all the right fats for a great keto meal or side dish. If you are going to have pasta, you MUST get it from Great Low Carb Bread Co. It will change your keto life LOL —> Click on my link to shop their products! 
Ingredients:
16 oz low carb elbow macaroni 2 tablespoons grass-fed butter 1/2 teaspoon xanthan gum (optional) 1 cup heavy whipping cream, room temperature 1 cup whole milk, room temperature 1 cup white cheddar cheese, grated 1/2 cup sour cream 1 3/4 cup sharp cheddar cheese, grated and divided 4 oz cream cheese 1/2 cup grated parmesan cheese 1/2 teaspoon garlic powder salt and pepper to taste 1/8 cup crushed pork rinds (for garnish—optional) Directions:
TIPS:
USE OUR FAVORITE BRANDS + PRODUCT
Follow us on Social Media | Did you try the recipe? Tag us! @thisketofamily
This Keto Family is a participant of the Amazon and other affiliate marketing programs, which means we may get paid commissions on editorially chosen products purchased through our links to retailer sites.
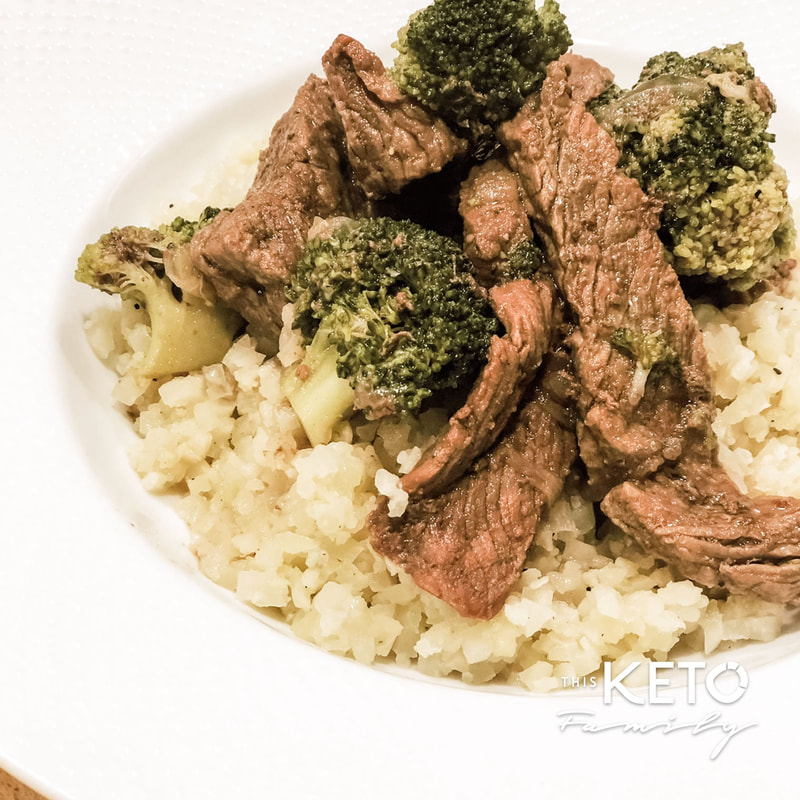
Craving an Asian inspired keto meal that the whole family will love? Broccoli beef is such an easy recipe to ketofy. What I loved about the Chinese Restaurant version was always the sweet, thick sauce that when you poured it over rice, made everything oh so yummy! However the problem with the Restaurant version—and the reason its a big no on the Keto diet—is because most traditional restaurant versions always use sesame seed oil (which is highly inflammatory), corn starch and brown sugar.
My beef broccoli keto version uses all keto-friendly ingredients to achieve the same sweet, rich sauce with tender cuts of beef and plenty of broccoli. Serve this on top of cauliflower rice and there you go! An easy keto dinner that you can make any night of the week. You'll be wondering why you haven't ever made it earlier! Serves: 4 Ingredients: 2 pounds New York steak (or meet of your choice), sliced thinly 2 cups broccoli florets 1 onion, chopped 1 tablespoon avocado oil 1/2 teaspoon ginger powder, divided 1/2 teaspoon onion powder 1/4 teaspoon garlic powder 1 tablespoon brown Swerve 1/2 cup + 1/4 cup liquid aminos, divided 1/2 cup water, divided Slurry Ingredients: 1/2 teaspoon xanthan gum 1 teaspoon avocado oil Directions:
Make it with our current product favs
Follow us on Social Media | Did you try the recipe? Tag us! @thisketofamily
This Keto Family is a participant of the Amazon and other affiliate marketing programs, which means we may get paid commissions on editorially chosen products purchased through our links to retailer sites.
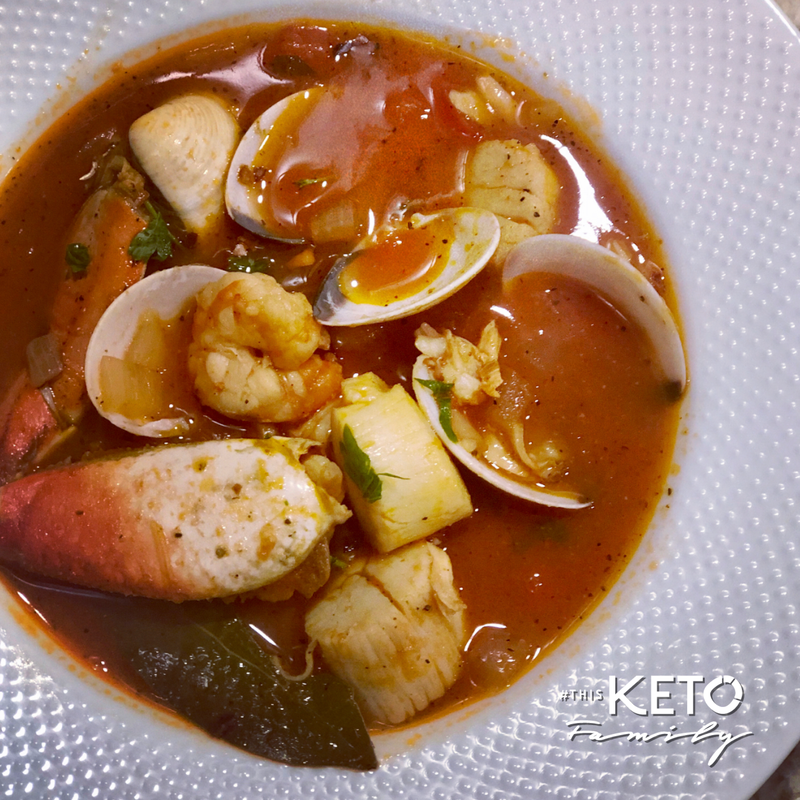 A super easy cioppino stew can warm up any dinner. The best part? It's completely keto-friendly, Cioppino is one of those meals that tastes so good and looks like it took all day to prepare but is in fact quite quick and easy, trust me. The hardest part is getting all of your ingredients lined up. Ingredients: 1 large onion, diced 3-4 cloves garlic, diced 1 red bell pepper, diced 2 teaspoons fresh parsley, chopped 1 teaspoon Italian seasoning 2 bay leaves 1/2 teaspoon red pepper flakes 8 ounces clam juice 4 cups seafood stock (or chicken stock) 20 ounces crushed tomatoes 4-5 pounds of seafood of your choice. Suggested combination:
3 tablespoons avocado oil, divided 1/2 teaspoon garlic powder, divided Salt and Pepper to taste Directions:
Follow us on Social Media | Did you try the recipe? Tag us! @thisketofamily This Keto Family is a participant of the Amazon affiliate marketing programs, which means we may get paid commissions on editorially chosen products purchased through our links to retailer sites.
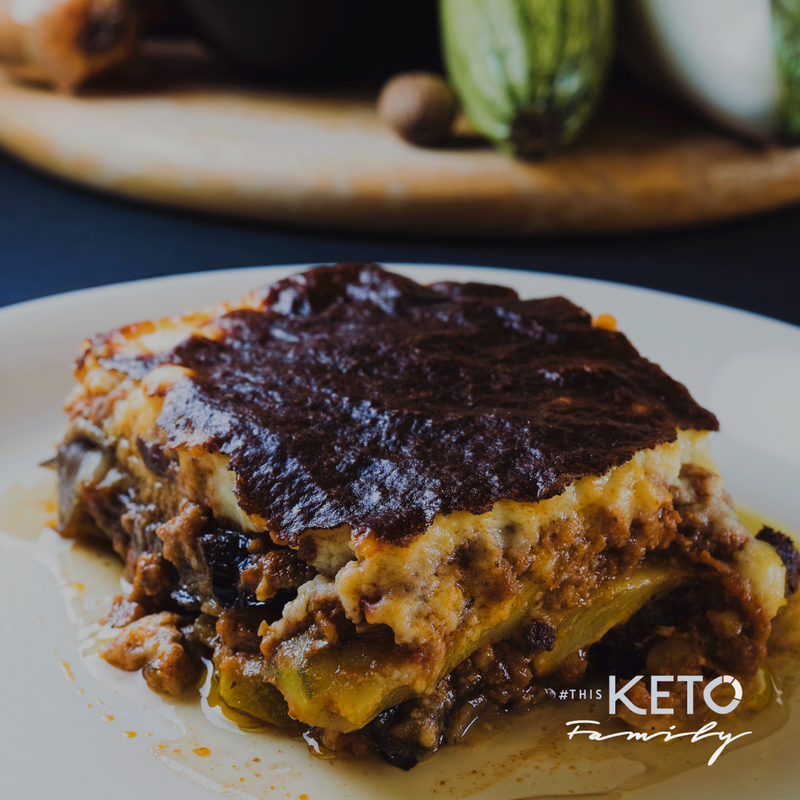
What I love about keto is that I can eat flavorful, delicious and comforting food every day and still lose weight. I mean what's better than that? This recipe is the epitome of comfort with a lovely Mediterranean vibe that spices up any week night dinner.
Moussaka is traditionally made with layers of potatoes and eggplants. Some versions call for zuchinni which you can totally use as well. But I found that eggplant along does the job for flavor and texture. I promise you won't even miss the potatoes! Ingredients—Filling: 3 large eggplant, sliced 1/8 inch discs 1 tablespoon avocado oil 1 medium onion, chopped 1 lb ground beef 1 teaspoon Monkfruit Golden sweetener 1 teaspoon cinnamon 1 tablespoon dried oregano 1 can tomato sauce Ingredients--Béchamel sauce: 1 tablespoon Kerrygold butter Xanthan gum slurry* 1/2 cup heavy whipping cream, room temperature 1 cup whole milk 2 egg yolks, beaten 1/2 teaspoon salt 1/2 teaspoon nutmeg 3/4 cup grated parmesan cheese *Ingredients—Xanthan Slurry: 3 teaspoons avocado oil (or olive oil) 1 teaspoon xanthan gum Directions:
USE OUR FAVORITE BRANDS + PRODUCTS
Follow us on Social Media | Did you try the recipe? Tag us! @thisketofamily
This Keto Family is a participant of Amazon and other affiliate marketing programs, which means we may get paid commissions on editorially chosen products purchased through our links to retailer sites.
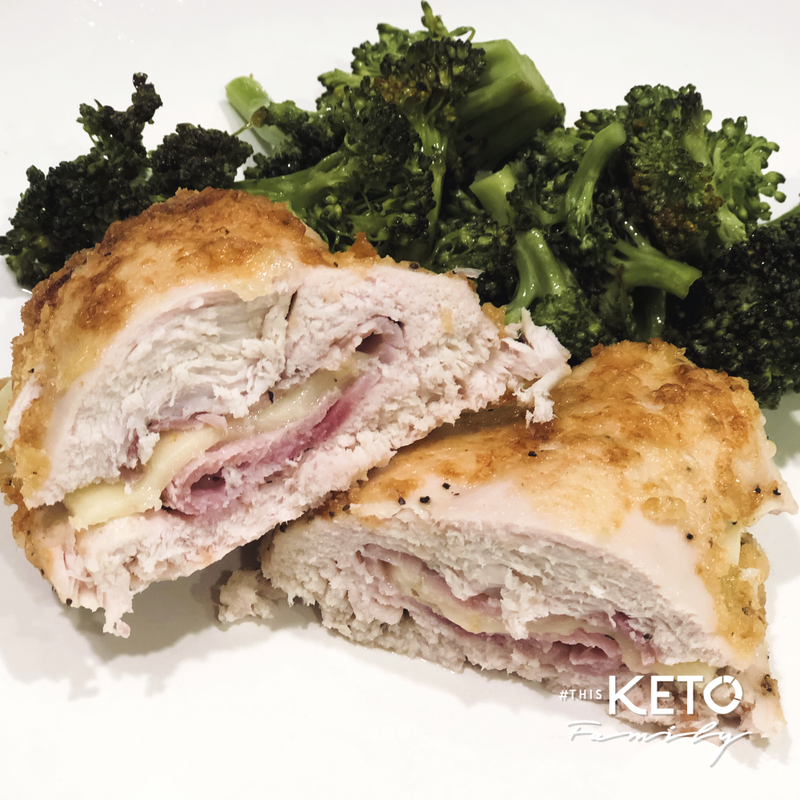 Chicken with ham and cheese, breaded and fried—how glorious does that sound? Chicken Cordon Bleu is one of those recipes that add a little pizazz to the humdrum baked chicken recipes. Whenever my family gets tired of baked or grilled chicken, I make chicken cordon bleu. The ingredients make this an easy choice to incorporate in any keto meal plan. Substitutions for non-keto ingredients are simple and the end product is just as tasty, if not even more so. The cheese traditionally used in a cordon bleu is swiss cheese, but lately I’ve been partial to gouda and let me tell you, the flavors are perfect. If you’re neither a swiss cheese nor gouda fan, don’t fret, any cheese will do really though I’d suggest provolone or a mild cheddar. Sub any cheese but don’t omit it. The cheese is actually what helps keep the chicken breast moist during the cooking process. So choose you favorite and get cooking! Serves: 4-6 People Ingredients: 6 boneless, skinless chicken thighs (you can use chicken breasts too) 6-8 slices deli ham 6-8 slices gouda cheese 3 eggs, beaten 1/4 cup parmesan cheese, grated 1/4 cup almond flour 1/2 cup panko pork crumbs Salt, pepper, garlic powder Avocado oil spray Directions:
If you do not have an air fryer you can pan fry the chicken in avocado oil and finish the cooking process in the oven 350º until you reach an internal temperature of 160º. Note using the oven will not make your outer coating as crispy, but it will still be delicious! Enjoy. Follow us on Social Media | Did you try the recipe? Tag us! @thisketofamily This Keto Family is a participant of the Amazon and other affiliate marketing programs, which means we may get paid commissions on editorially chosen products purchased through our links to retailer sites.
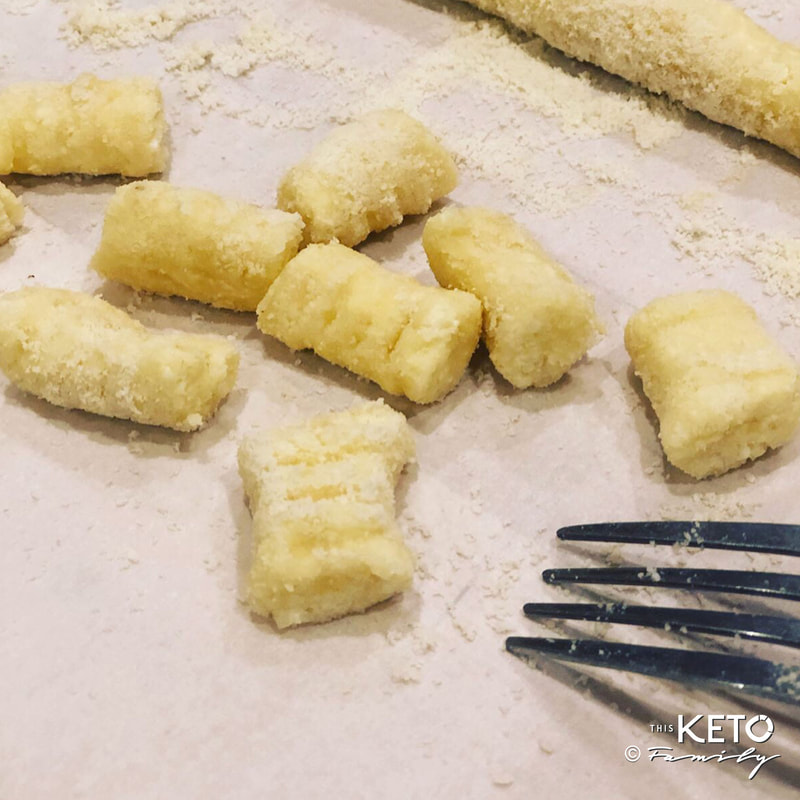
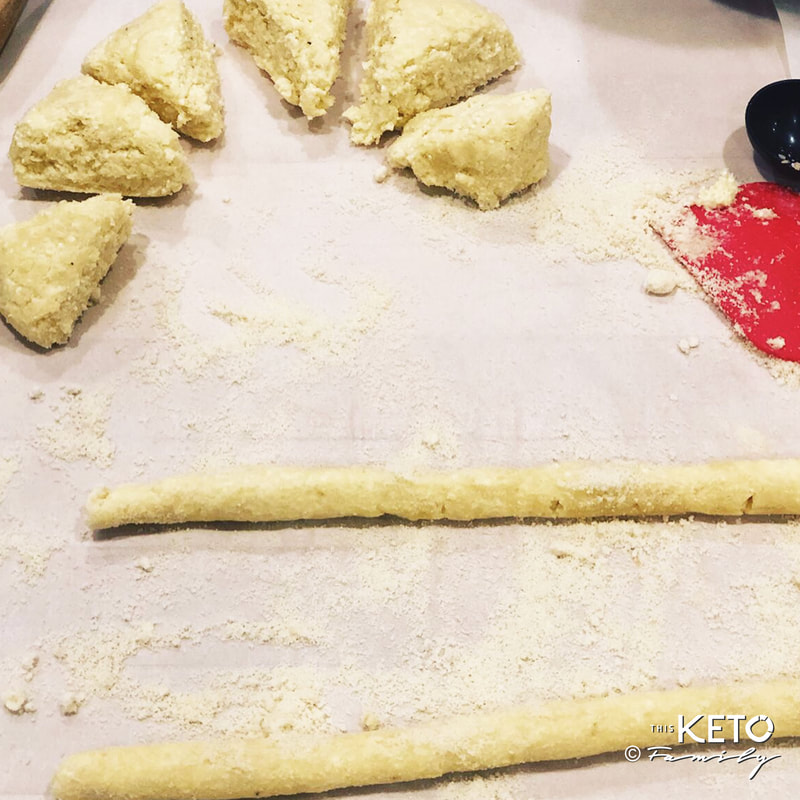
Before we went Keto my family had pasta at least 3 days a week for dinner, possibly more. I never had any desire to make my own pasta then because there were so many options out there. Fast forward to being full keto and there really is NO keto pasta option at all, so here I am deciding that I needed to make my own; not because I was necessarily craving pasta, but because I wanted to see if it was possible. My family and I have found some relatively decent pasta alternatives— shirataki noodles and black bean noodles—but yet, I still wanted to make my own. Before keto I loved the soft, chewiness of gnocchi. There was something so comforting about eating a bowl of it. I knew that gnocchi could be made with ricotta or even potatoes. Since potatoes were out, I opted for ricotta for these lovelies. They are quite delicate, so read the notes and tips carefully so they don't fall apart while you’re boiling or sautéing them. Serve them warm, straight from the pan drenched in your sauce of choice. Enjoy! Ingredients: 1/2 Tub (approx 7-8oz) ricotta cheese, full fat 1 egg, beaten 3/4 cup shredded parmesan cheese 3/4 cup, plus 1 tablespoon almond flour 2 tablespoons psyllium husk powder pinch of salt Directions: Prepping the Gnocchi dough:
This Keto Family is a participant of the Amazon affiliate marketing programs, which means we may get paid commissions on editorially chosen products purchased through our links to retailer sites.
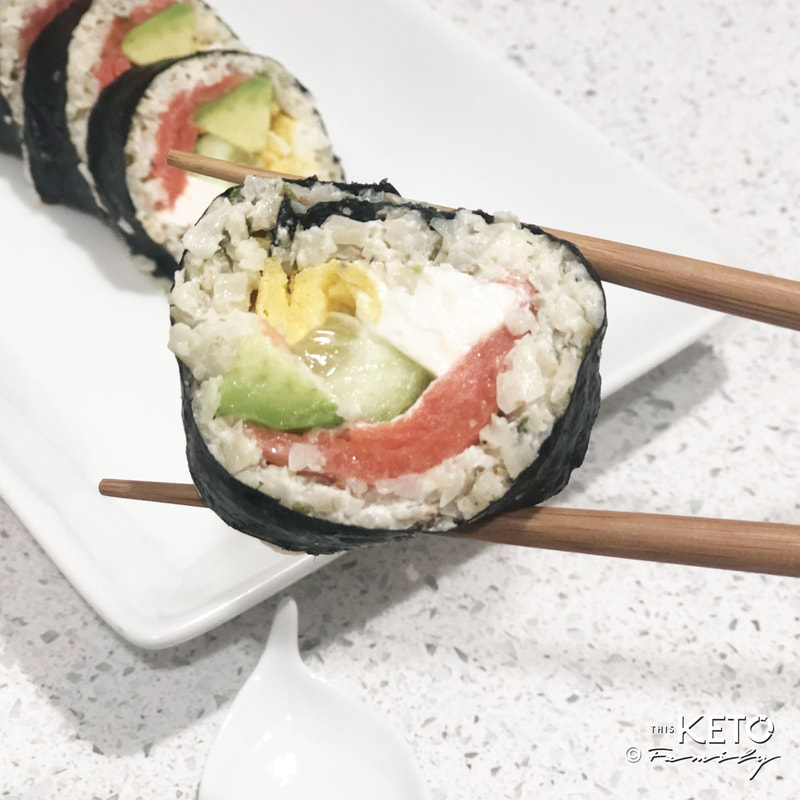
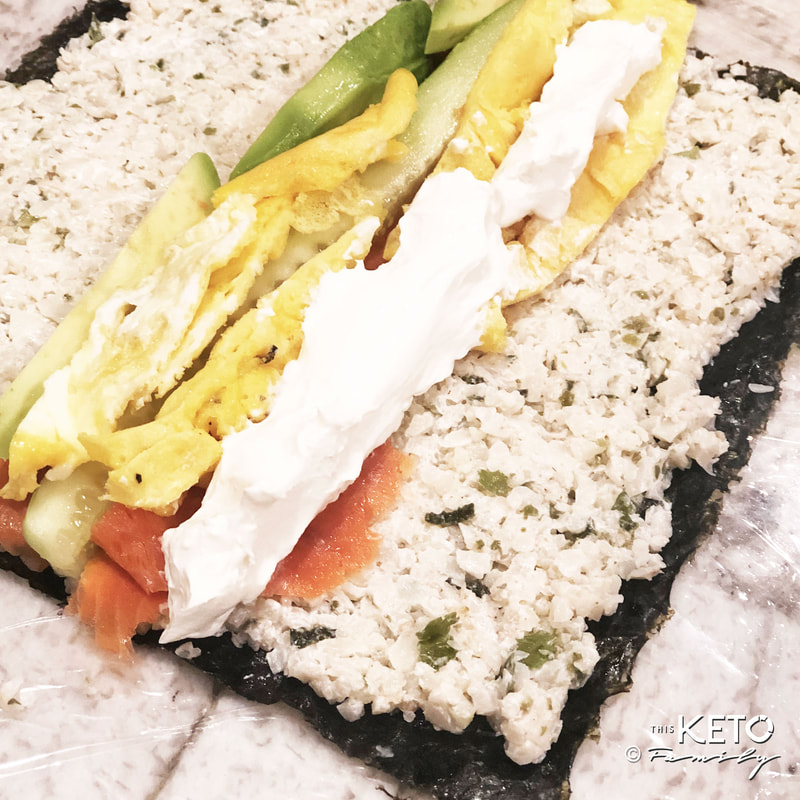
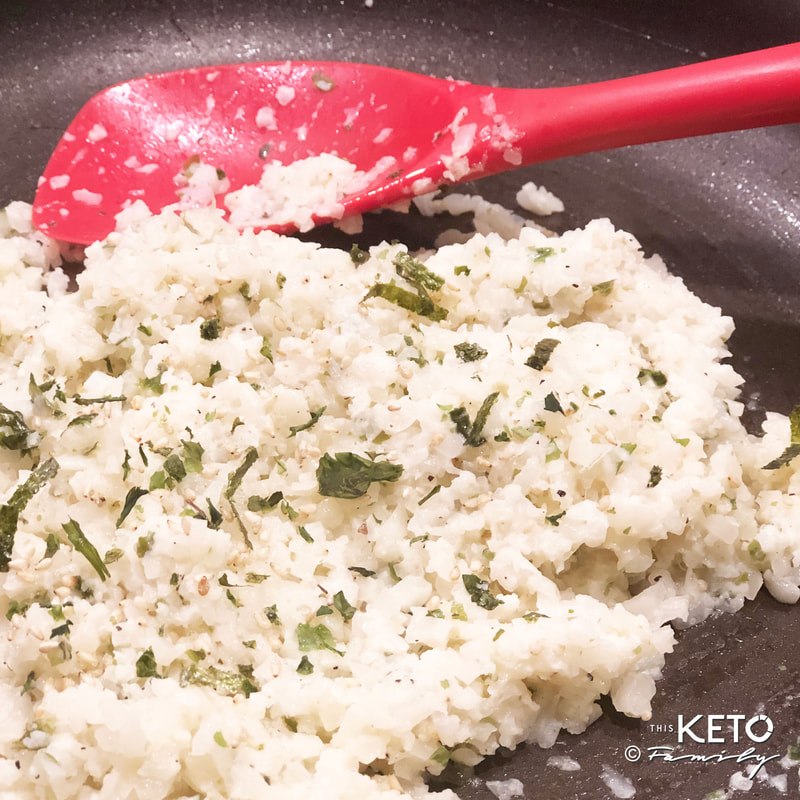
'I'm kinda surprised just how much this looks and tastes like sushi rice. If you're a sushi lover like myself you know that sushi rice is a bit sticky and has a hint of rice wine vinegar to it which adds a nice sweetness and tang.
This recipe uses riced cauliflower and is seasoned in such a way that it tastes just like the real thing. The trick to this is to cook your cauliflower on the stovetop for a few minutes. If you simply steam your cauliflower in the microwave, like most people, you'll have bits of hard-ish cauliflower which doesn't do a good job of convincing anyone. Traditional white rice is soft and sushi rice is a bit on the stickier side. So I used some gelatin (shhh thats the secret) and a bit of cream cheese (who doesn't love cream cheese) to hold the cauliflower together. Add you choice of fillers, roll em up and there you have it. Keto style sushi, that is low carb and won't fall apart when you pick it up with chopsticks (I know because I tried)!
Directions:
If you are going to add the gelatin, follow the first 2 steps. Otherwise skip to step 3.
That's it! Allow the rice to cool before adding it on top of your Nori wrapper sheets. If the mixture is too hot, the nori will rip when you try to roll it. Happy eating!
This Keto Family is a participant of the Amazon affiliate marketing programs, which means we may get paid commissions on editorially chosen products purchased through our links to retailer sites.
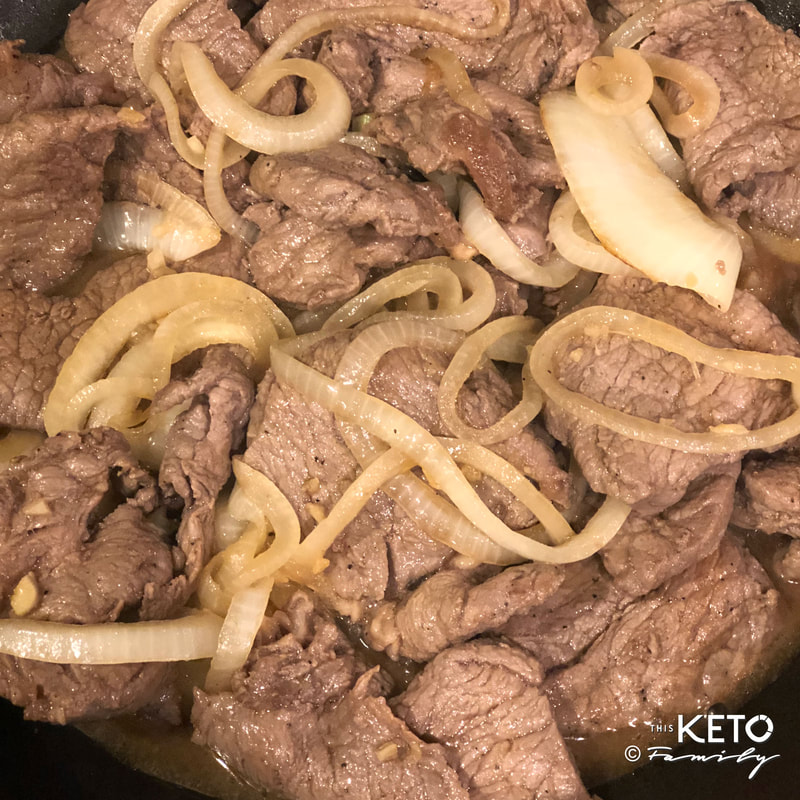 Here is a traditional Filipino dish I keto-fied rather easily. The measurements are pretty much the same as I learned from my mom, just used keto versions. Next time I make this we'll go really traditional and add the quail eggs - YUM! Ingredients:
Directions:
Serve this hot over cauliflower rice. Enjoy! This Keto Family is a participant of the Amazon affiliate marketing programs, which means we may get paid commissions on editorially chosen products purchased through our links to retailer sites.
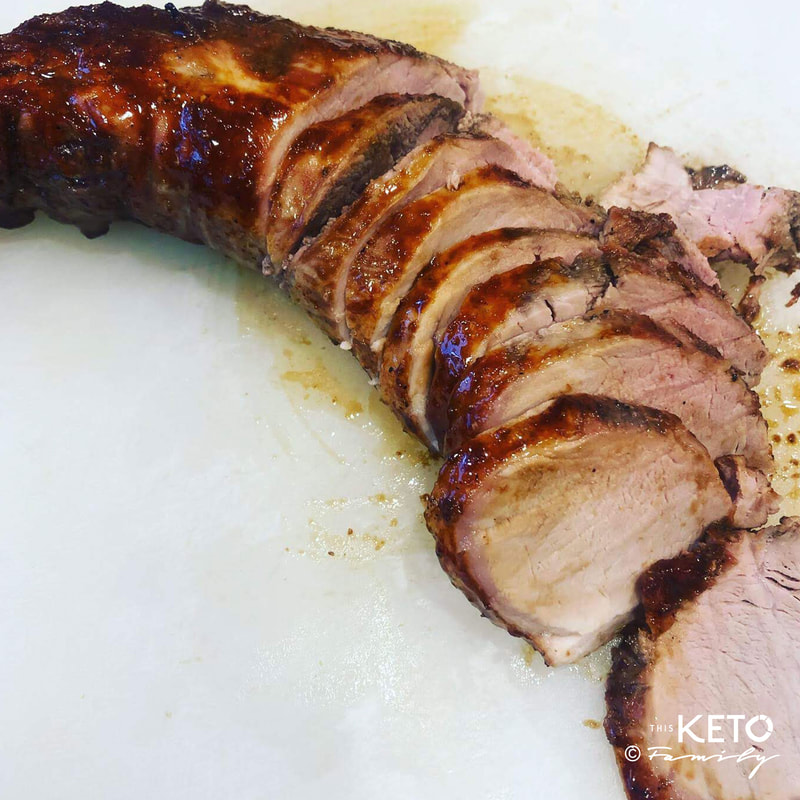
This dinner can be on the table in under 20 minutes — no joke! Serve it with a side salad or steamed broccoli and call it a day! This is sure to please even the pickiest eaters. The key to this to not to overcook the pork. Take it out slightly under-done and let it rest (it will continue to cook) while you prepare the sweet garlicy dipping sauce/gravy.
Directions:
This Keto Family is a participant of the Amazon affiliate marketing programs, which means we may get paid commissions on editorially chosen products purchased through our links to retailer sites.
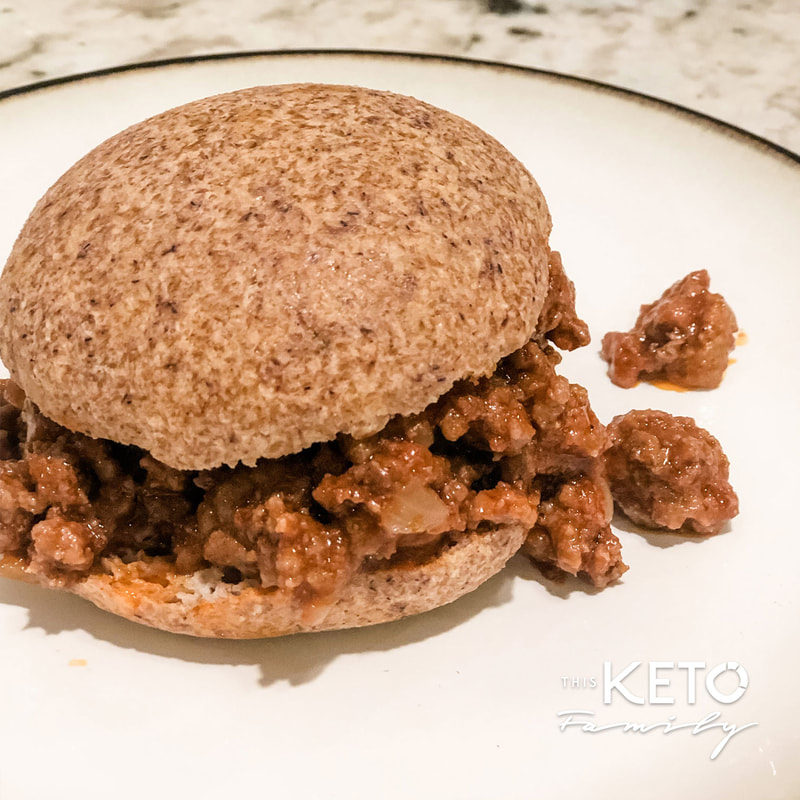 My kids love this sweet and tangy meaty dinner. They seem to love the messiness that also comes along with this meal. Perhaps they feel like it gives them permission to be messy—almost like you need to act messy—to eat this meal properly. Perhaps it’s a bit liberating in a way. In any meat sauce and especially sloppy joes, I used to LOVE hiding veggies. Nowadays my kids know all my tricks and have grown accustomed to eating a wide variety of veggies so the need to hide veggies is no longer a requirement. But I remember the earlier years of training these maturing pallets. I am of the philosophy that a child’s immune system and metabolic strength develops early and negotiating veggies over carbs is NOT an option in our household. We talk about what things on their plates are most important, “non-negotiables” that they must eat. I know it sounds drill sergeant-ish, but I believe they will be better from it in the future. If you are at the stage of hiding veggies, then hide away mama! Below is how I still make it. My kids know what’s in it now, but back then I’d just tell them it was ground beef. They ate it and I was happy. Pairing: Keto Dinner Rolls Serves: 4-6 Ingredients:
Directions:
Follow us on Social Media | Did you try the recipe? Tag us! @thisketofamily This Keto Family is a participant of the Amazon and other affiliate marketing programs, which means we may get paid commissions on editorially chosen products purchased through our links to retailer sites.
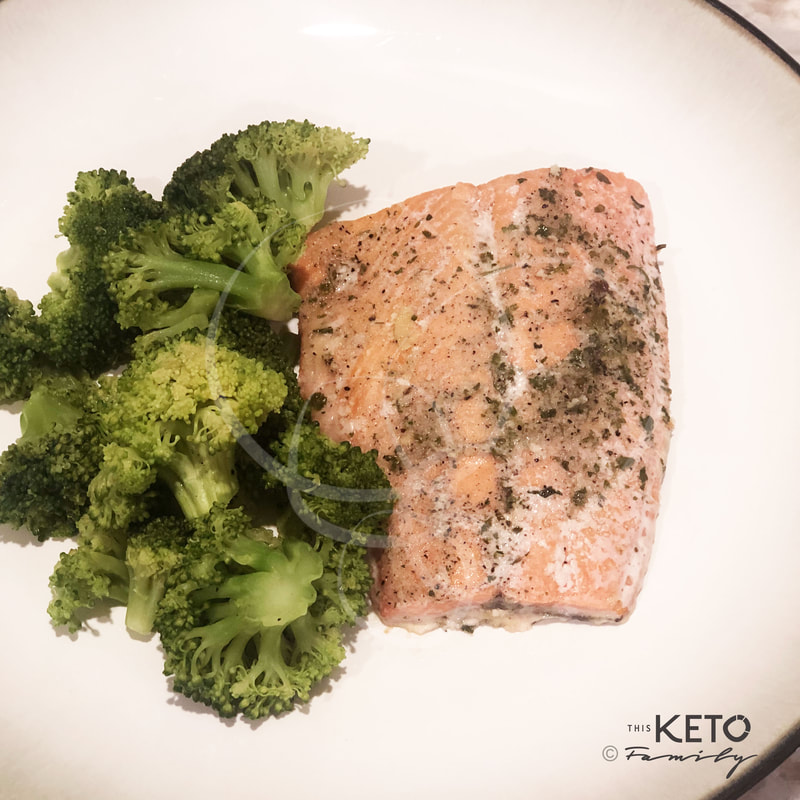 If you are just starting keto, I always recommend to #KeepKetoSimple. When starting a new diet or lifestyle, you want to make the transition as painless as possible. I know if post a bunch of semi-complex recipes, but fret not, the ability to think of a recipe on the whim and to know its general macro ratio for keto success will come. In the beginning, just choose a protein (about 4oz depending on your exercise and activity) and a green vegetable steamed or sautéed and voila, instant meal. Well, not really, but it an equation for success that make transition super simple, at least in the first week or two. Need more meal ideas? Contact me and get my free 7-Day Meal Plan! One of the meals I suggest on the plan is this Easy Baked Salmon. You can go from oven to table in literally 20 minutes!  Ingredients: 6 salmon fillets 1 tablespoon avocado oil 1 tablespoon liquid aminos (I use this one) 1 teaspoon garlic powder 1 teaspoon onion powder 1/2 teaspoon sea salt 1/2 teaspoon pepper 1/2 teaspoon dired parsley 2 tablespoons grass-fed butter, divided in 6 pieces Appliances/Tools: Silicon pastry brush Instructions:
Pair this protein with a side salad or steamed broccoli and you have yourself a perfectly balanced keto meal! Don't forget to add some butter to your veggies too =)  This dough is so versatile. I've used it to make pizza crusts, keto bagels, keto hotdog buns (or more like pigs in a blanket). The key to this recipe is to make sure the almond flour is completely mixed in with the cheese so that you don't get clumps of flour when you bite into the dough.
You can make these as thin or thick as you want. They keep their shape and can hold up to having toppings and cheese loaded on top without falling apart. And it's super easy too. You can have Keto pizza without guilt in about 25 minutes or less — faster than it takes to order pizza and have it delivered! Ingredients (Dough): 1 cup almond flour (I recommend this one) 1 1/2 cup shredded mozzarella cheese 1 oz cream cheese 1 egg Pinch of salt Pizza Sauce (We love Rao's. Try it here.) Toppings of your choice. Optional Seasoning: You can add 1/2 tsp of any of the below spices to give your crust a boost of flavor:
|

AuthorHi! I'm Arlene – wife, mother of 3, entrepreneur and keto foodie. I love to make, share and try different, delicious keto food recipes that are easy to make and most-importantly kid-friendly. Life is hard as it is, feeding our families should be easy, fun and nutritious. Archives
December 2020
Categories
All
|


 RSS Feed
SERVICES |
Recipes |
About |
CONNECT with Us |
©2019-2022 THIS KETO FAMILY ALL RIGHTS RESERVED. | PRIVACY POLICY & DISCLOSURES | CLIENT LOGIN