|
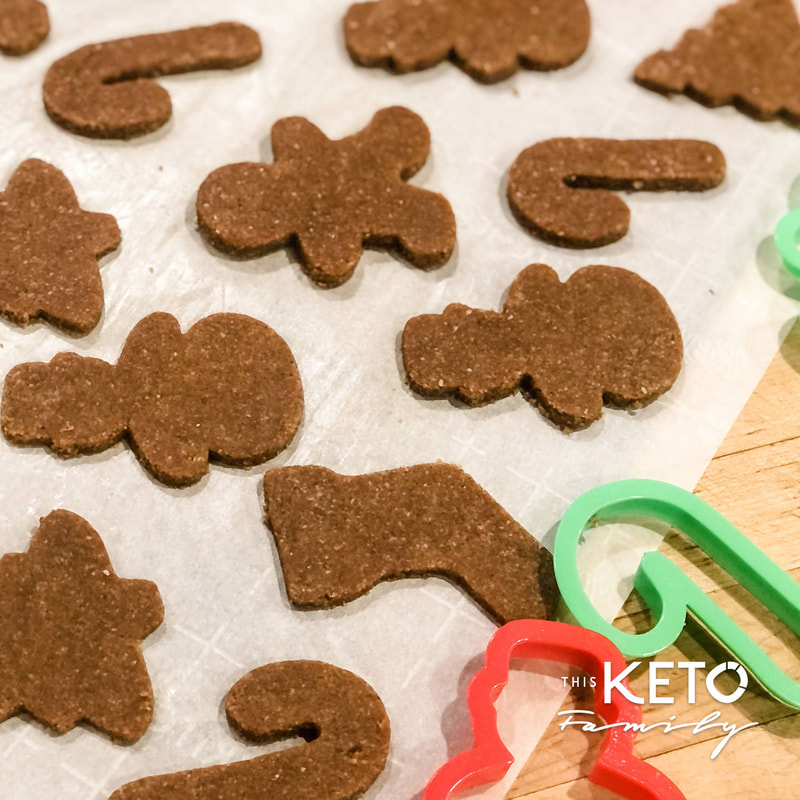
Gingerbread cookies. The epitome of Christmas. Funny thing is I never ate or decorated gingerbread cookies when I was young, but my kids asked for them last year so I set off on a mission to make a keto-friendly gingerbread recipe. Personally I like gingerbread cookies that are crunchy with a nice balance of sweet and spicy. I'm not a huge fan of overly sweet or overly spicy versions. If you're looking for a lightly sweet, crunchy keto gingerbread cookie recipe, then this one is for you. Crunch There are couple secrets to crunchy cookies when baking keto. Believe it or not the type of sweetener you use contributes to the final texture of the piece. It not only has a different sweetness profile (so be careful when substituting sweeteners when they are listed on a keto recipe. They can be listed because of their end property or sweetness level. Always use the sweetener lists to get the closest results. I know, there are A LOT of different keto sweeteners, but trust me, choosing the right one can be the difference between chewy or crunchy, sickly sweet or the perfect sweetness.) For this recipe I use Monkfruit sweetener a combination of the classic version and just a tablespoon of the Gold version. Why? Monkfruit crystalizes after it is warmed so the result is an extra level of crunch that you wouldn't get otherwise from a different sweetener. Also, Monkfruit is on the milder side of sweet so if you use something else, I would gut your sweetener down a bit. The Monkfruit Gold version is much sweeter so 1 tablespoon is sufficient. Lastly a tablespoon of psyllium husk brings all the ingredients together and allows it to firm up and hold the best. I hope you enjoy this recipe. Look out for my icing recipe to be posted soon! Yield: Recipe makes 12-15 cookies Ingredients: 2 cup almond flour 1 tablespoon coconut flour 1 tablespoon psyllium husk 1/4 teaspoon salt 1 1/2 teaspoons baking powder 2 teaspoons group ginger 2 teaspoons ground cinnamon 1/4 teaspoon ground clove 4 tablespoons butter, softened 1 egg, beaten 1/4 cup sweetener (I like Monkfruit for this) 1 tablespoon sweetener, gold (I like Monkfruit for this) 1 tablespoon black strap molasses Directions:
Net Carbs: 2.68g Net Carbs per cookie Net carb calculations are approximate and depend greatly on the brands and ingredients used. Net carbs are provided to provide a ballpark calculation. Use a carb calculator app to find your exact net carb count. Follow us on Social Media | Did you try the recipe? Tag us! @thisketofamily This Keto Family is a participant of the Amazon and other affiliate marketing programs, which means we may get paid commissions on editorially chosen products purchased through our links to retailer sites.
0 Comments
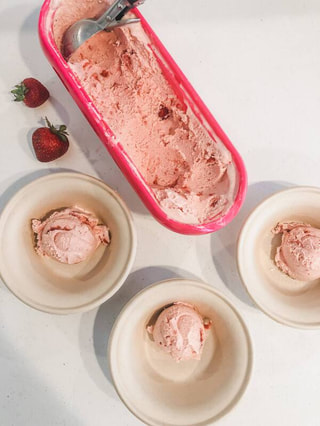
Did someone say ice cream? We are an ice cream family. Before our keto transformation we used to eat ice cream practically daily for dessert. Looking back, we so didn't need those extra carbs and sugars right before bed. But that got us here today and helps guide my decisions at this season of our lives.
Keto ice cream is one of those desserts that seem like it could easily be a guilty pleasure, but on keto it's quite frankly a mainstay. Plus if your ice cream is made with organic, grass fed heavy whipping cream and other quality ingredients, then bring the ice cream sundae bar on over as I check all the boxes off my macros. This is exactly the reason why the thought of making my own ice cream appealed to me so much. As I've gotten deeper into my ketogenic journey I'm realizing more and more that the core concepts about quality ingredients are just as important, if not more so, than simply counting net carbs. Yes, you read that right. Net carbs in keto is one part of a greater picture of wellness. Macro ratios are also important. In therapeutic ketosis dietitians strive to hit a near perfct macro ratio at every meal. And guess what? This ice cream recipe does just that. The macro ratios are just perfect with this recipe (77-18-5) which helps justifies having a bowl after dinner even more! Also most of the keto ice creams out there have started giving me GI discomfort because of their specific blend of sweetener. Others just aren't organic—both things that are important to me.
So there began our summer goal to make vanilla ice cream. Vanilla ice cream quickly turned into a list of 10 flavors I was set to make as my kids quickly rattled off many favorite flavors. My brother in law also makes ice cream, but never strawberry. And with a strawberry-loving daughter, a huge backyard garden yield and an equally strawberry-loving husband, the challenge was accepted to make keto strawberry ice cream.
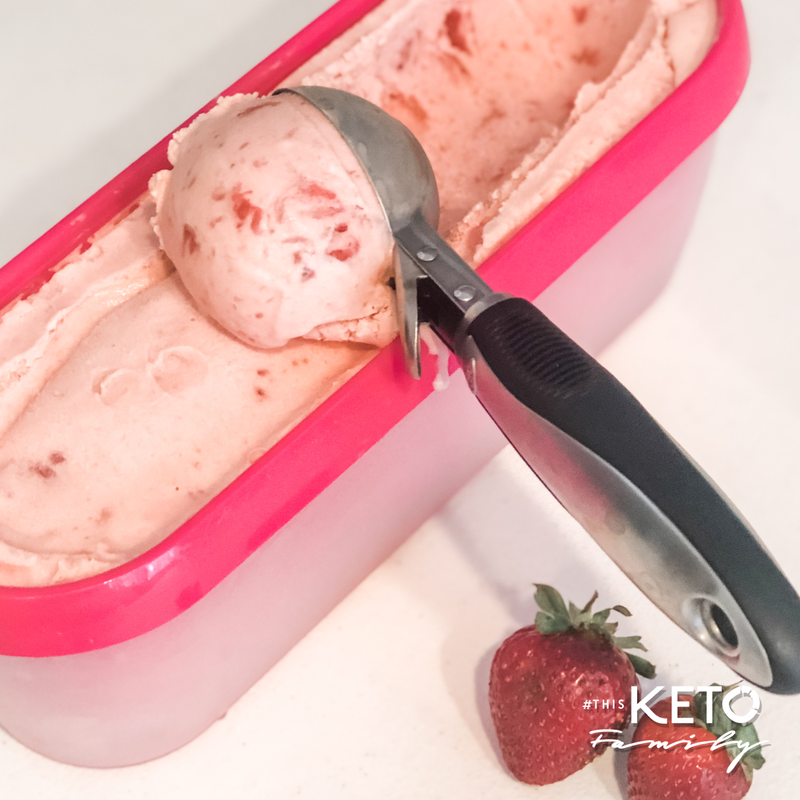
The custard base is the same on all my ice creams. What I like about it is that it is EASY. I mean come on now who has time to temper the eggs? (Hint: I looked this up and apparently tempering your eggs for homemade ice cream is an urban legend LOL. That was enough for me and allowed me to simplify a step—done!) Blending some of the strawberries and leaving some chunky gives you that authentic strawberry ice cream look with the specs and pieces of strawberries in your ice cream. YUM!
Ingredients:
4 cups heavy whipping cream 3 eggs 3/4 cup Allulose sweetener (You can use Xylitol but it gives me IG discomfort, so I prefer Allulose) 2 tbsp whey protein, unflavored (optional) 1 tbsp vanilla extract 1/8 tsp salt 3 cups fresh strawberries, roughly chopped 1 tbsp lemon juice 1/4 cup Allulose sweetener Directions:
USE OUR FAVORITE BRANDS + PRODUCTS
Follow us on Social Media | Did you try the recipe? Tag us! @thisketofamily
This Keto Family is a participant of the Amazon and other affiliate marketing programs, which means we may get paid commissions on editorially chosen products purchased through our links to retailer sites.
For my daughter's birthday I wanted to give her a special day filled with yummy treats, desserts and foods she loves. After-all what birthday party (especially a kid one) is complete without massive amounts of sugar, candy and sweet treats, right? It is something of a cultural thing really. When you go to a party or an event, all diets are "on-pause" or those days instantly become a "cheat day" (you know what I'm saying.) And if you knew me before my keto journey, you knew that a "dessert bar" was a very common, if not a standard thing, at our parties.
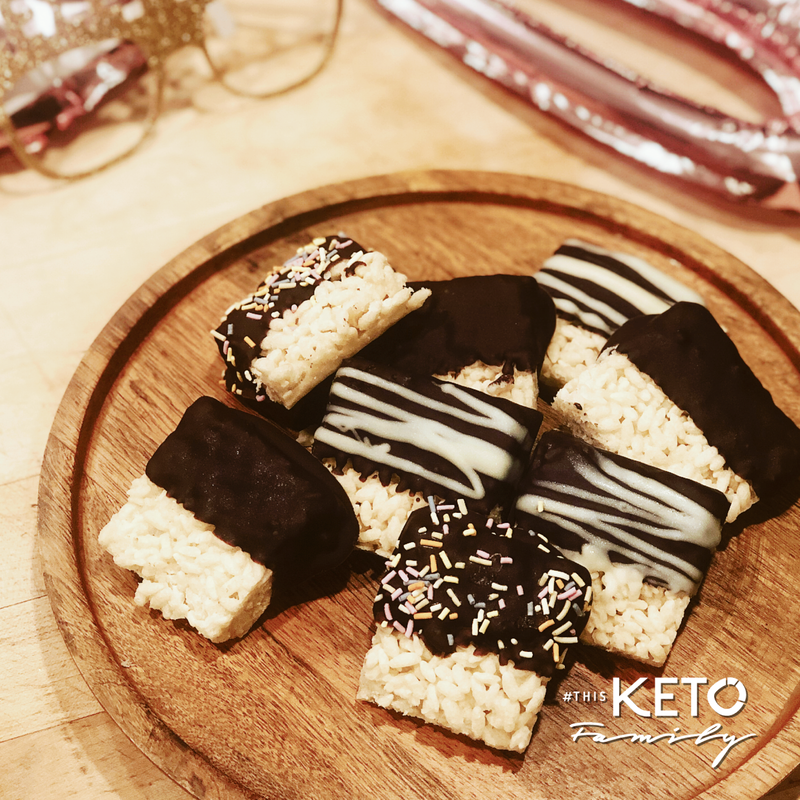
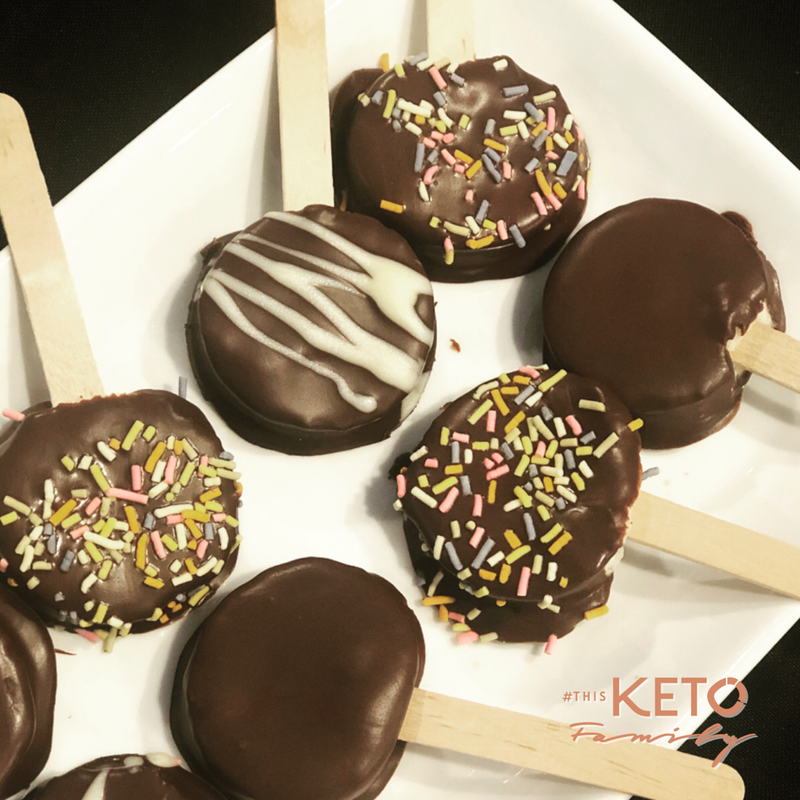
However this now sugar-free mama has a loud, convincing voice inside yelling, "There must to be a way to achieve this without bringing back the processed food crap we painstakingly worked so hard to get out of our house." If it was possible, I wanted to do it. So thus began my journey to think up foods that I could do a keto remake of. I loved rice krispies as a child and love how now they are so artisan looking half dipped in chocolate and swirled with white chocolate or sprinkles. This seems like a good keto remake candidate. Now that the market is slightly saturated with keto cereal companies that are basically using protein powders and alternative sweeteners, there are many options to choose form that are low carb and tasty. These cereals are crunchy and quite convincing, living up to my 80's childhood standards of cereal. The Highkey brand recently launched a cereal line to add to their product repertoire. Their new "frosted" flavor is also in the shape of a rice krispie. Enter inspiration! It would be perfect and look like the real deal! Ingredients: 1/2 batch keto marshmallows (Click here for our recipe) 1 box Highkey brand frosted cereal (Or other keto cereal flavors you like) 2 tablespoons grass-fed butter** Sugar free sprinkles (optional) Directions: **If you've already made your marshmallows, then follow the steps below:
**If need to make marshmallows first, then follow the steps in our recipe for Sugar-Free, Keto Marshmallows here.
TIPS
USE OUR FAVORITE BRANDS + PRODUCTS
Follow us on Social Media | Did you try the recipe? Tag us! @thisketofamily
This Keto Family is a participant of the Amazon and other affiliate marketing programs, which means we may get paid commissions on editorially chosen products purchased through our links to retailer sites.
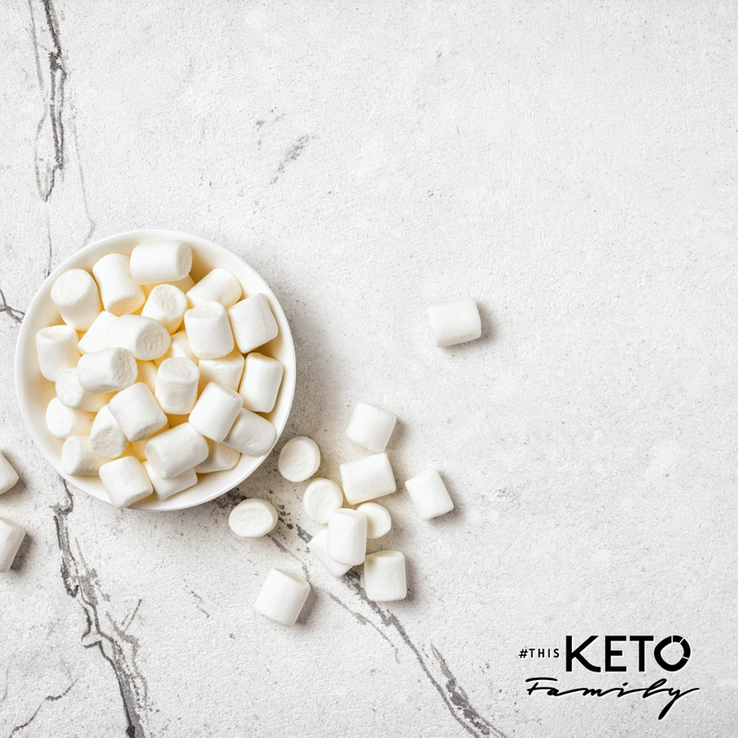
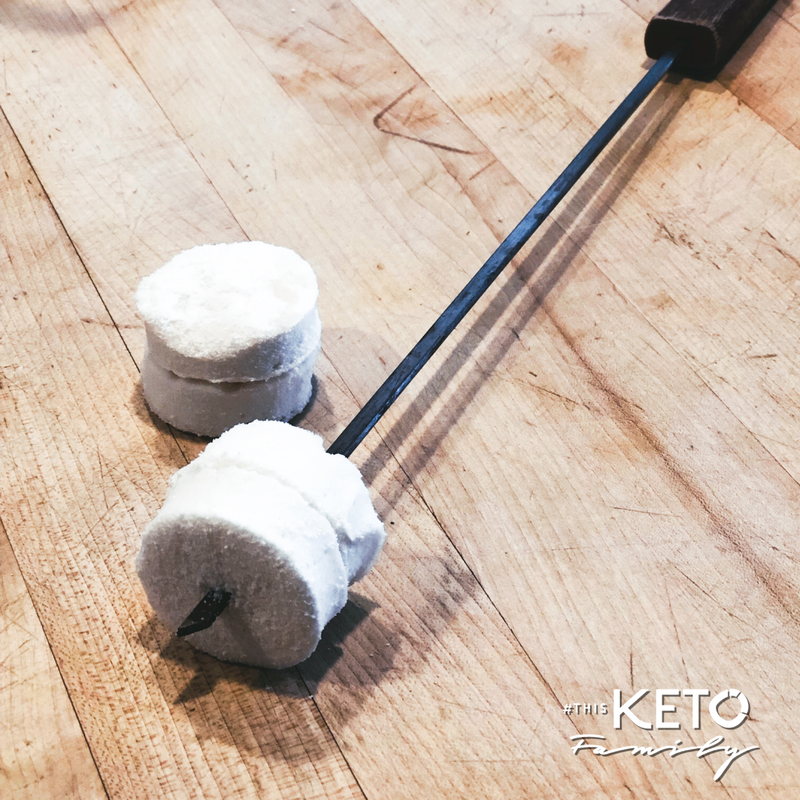
Marshmallows. When summer rolls around our house my kids are begging to go outdoors and camping. And naturally with every camping trip comes the necessity of s'mores!! Since my kids transitioned to keto, I've made it my mission of carefully replace their sugary treats with delicious-tasting keto alternatives. My goal was not to dupe them, but more to educate them about real ingredients as well as show them that "good" ingredients can also taste great! This simple marshmallow recipe brought this fluffy dessert/treat back into our lives, but alas, its roasting ability–particularly over an open fire is non-existent. If you try to roast these, the marshmallow will simple melt. I'm still working on a blend that can withstand a campfire and will brown and caramelize like a traditional marshmallow. If you cut these into small squares you can successfully add them to hot chocolate and they will melt as expected, so thats good! But they are too delicate to stand up against camp fires. However this keto version does get an "A" for its taste and texture—key for such an iconic food item. The key to achieving the correct texture in this recipe is to pump enough air into the gelatin. This will create the air pockets in the batter and therefore the spongy/pillowy bounce we're familiar with. The best way to do this? Using a stand-mixer. You can use a hand mixer, however the power is definitely a bit more concentrated – which adds more agitation to the batter. Though agitation causes air to get in the batter, too much will actually create density – so be careful. The better alternative to a stand mixer is just to mix the mixture by hand. But be warned that you will likely be mixing for a good 10-12 minutes so prepare for an arm workout. After you've made your marshmallows, you can eat them as is or dip them in chocolate. Or you can use them to make keto rice krispie treat! Yup you heard me right. See the recipe below! Tools You'll Need:
Ingredients: 4 tablespoons unflavored, grass-fed gelatin 1/2 cup cold water 1/2 cup warm/room temperature water 2/3 cup allulose sweetener 2 teaspoons Vanilla extract 1/4 cup powdered sweetener (for dusting) Directions:
Follow us on Social Media | Did you try the recipe? Tag us! @thisketofamily This Keto Family is a participant of the Amazon and other affiliate marketing programs, which means we may get paid commissions on editorially chosen products purchased through our links to retailer sites.
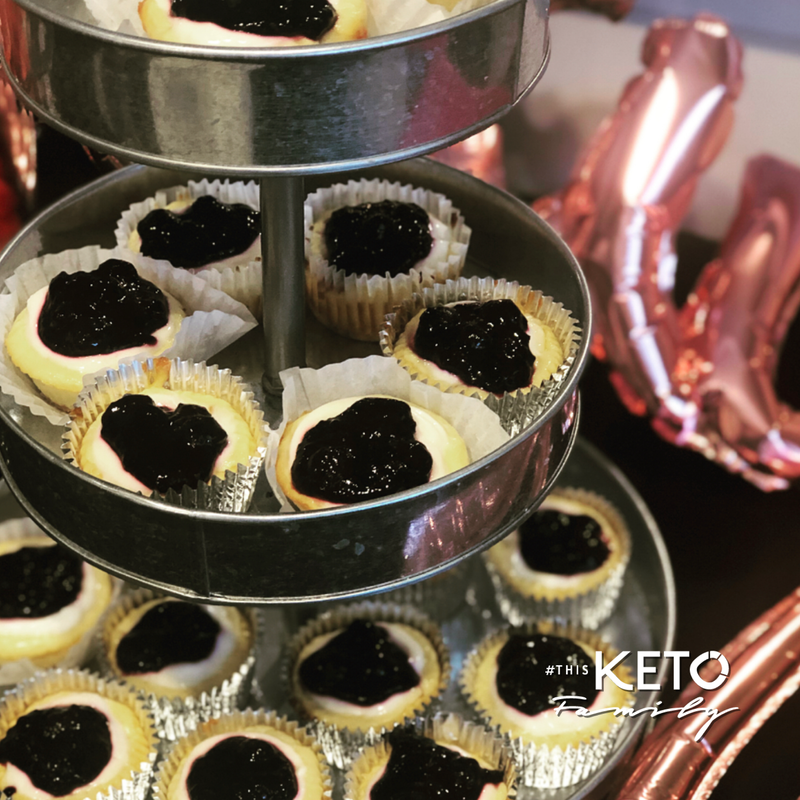
I never was a fan of fat bombs. Something about eating a cold, frozen ball of butter or coconut oil never appealed to me. If this is you, then look no further my friends. These mini cheesecakes—aside from being a great potluck item to bring or have at your next party—these beauties double as a kick butt keto fat bomb.
I kid you not, in the beginning when I first transitioned my family to keto, I would make a batch of these cheesecakes to keep in the fridge and have when I needed a sweet fix or to bump up my fat intake for the day. It almost felt sinful in the beginning to be able to eat a personal sized cheesecake EVERYDAY! As far as potluck worthy, YES! If you plan to bring this to a party make sure you make double the batch so you can save some at home for yourself because I guarantee that there will be none left! These beauties are super easy to make. There are a few steps since you have to bake the crust first and then top them once cooled, but I assure you that it will be all worth it. The best part? Each mini cheesecake is approximately 2.61 net carbs!!!! (Woohoo, happy dance). Before keto I used to make these S.A.D equivalent ("Standard American Diet" equivalent which means with "normal" ingredients and "normal" sugar). Can you guess how many carbs/sugar one "normal" mini cheesecake set you back? 21 grams!! These keto mini cheesecakes are one-tenth the net carbs as a normal one! Wow—I'll take sugar free and keto all day, every day. Do yourself a favor. Pick 1 Sunday afternoon and make these for yourself for the week. Hide them from your family members who aren't keto (or else they'll eat your stash LOL). You're welcome! Tools you'll need
20 mini cheesecakes Ingredients: 4 8-oz blocks cream cheese, room temperature 4 eggs, room temperature 1 cup allulose sweetener 1 teaspoon vanilla extract 1 cup almond flour 1/3 cup Swerve sweetener 3 tablespoons butter Ingredients–Topping: 1 8-oz tub sour cream 1 tablespoon Swerve sweetener 1 teaspoon vanilla extract 1 10-oz bag frozen blueberries 1/2 lemon, juiced 1/2 cup water 3/4 cup allulose sweetener xanthan slurry *Ingredients—Xanthan Slurry: 2 teaspoons coconut oil (or olive oil) 1/2 teaspoon xanthan gum Directions:
USE OUR FAVORITE BRANDS + PRODUCT
Follow us on Social Media | Did you try the recipe? Tag us! @thisketofamily
This Keto Family is a participant of Amazon and other affiliate marketing programs, which means we may get paid commissions on editorially chosen products purchased through our links to retailer sites.
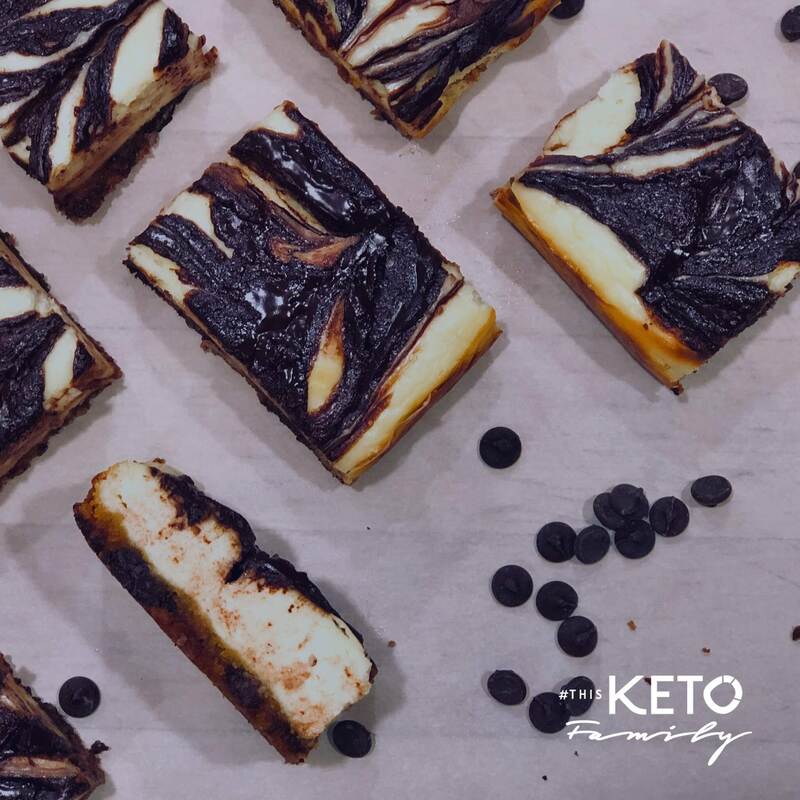
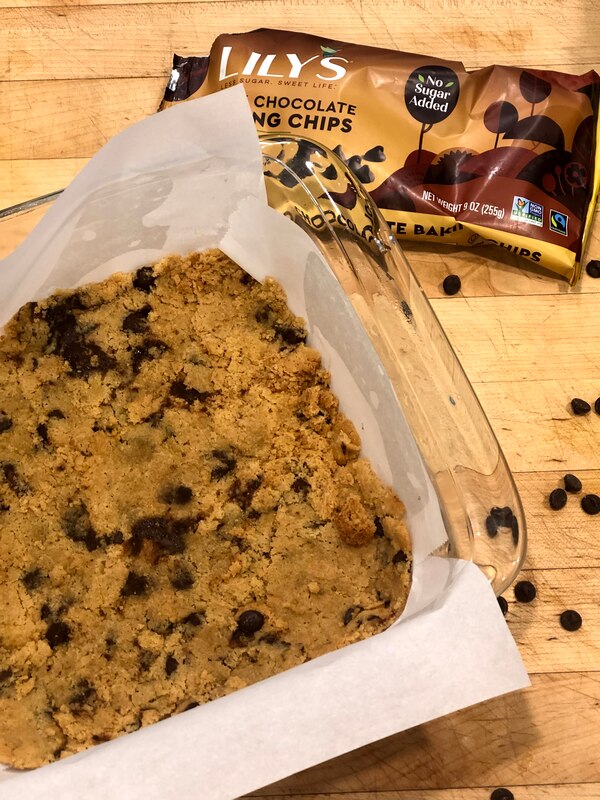
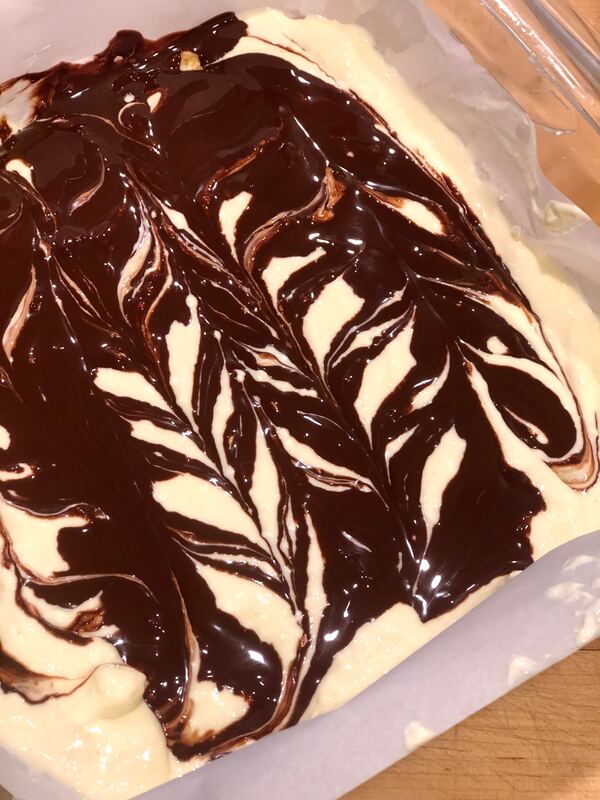
I hate wasting food and love the idea of using leftovers for something new. The other day we made Keto Chocolate Chip Cookies (click for my recipe) and they were delicious, but the recipe yields about 24 cookies. After eating cookies for 4 days in a row, one can become "cookied-out". LOL –hard to image I know. We still had 5 cookies left and since I hate wasting, I wanted to repurpose them. I was debating a cookie ice cream, but decided these cheesecake bars were better! They hit the spot and I love the cookie bottom. Adds a little something extra to these. I used Lily's dark chocolate chips in these (my kids, actually like the taste now), but feel free to use milk chocolate if you want a sweeter end-product. The dark is obviously more keto-friendly, but if that isn't your focus, then go for milk chocolate. Next time I think I'm trying a white chocolate, raspberry cheesecake so stay tuned for that! Makes: 12 Bars Ingredients: 5-6 chocolate chip cookies (or make my Keto Chocolate Chip cookies recipe here) 2 blocks cream cheese, room temperature 2 Eggs room temperature 1/4 Cup + 2 Tablespoons Swerve sweetener 1/2 Teaspoon Vanilla extract 1/4 Cup Lily's chocolate chips 1 Teaspoon Coconut oil Directions:
Follow us on Social Media | Did you try the recipe? Tag us! @thisketofamily This Keto Family is a participant of the Amazon affiliate marketing programs, which means we may get paid commissions on editorially chosen products purchased through our links to retailer sites.
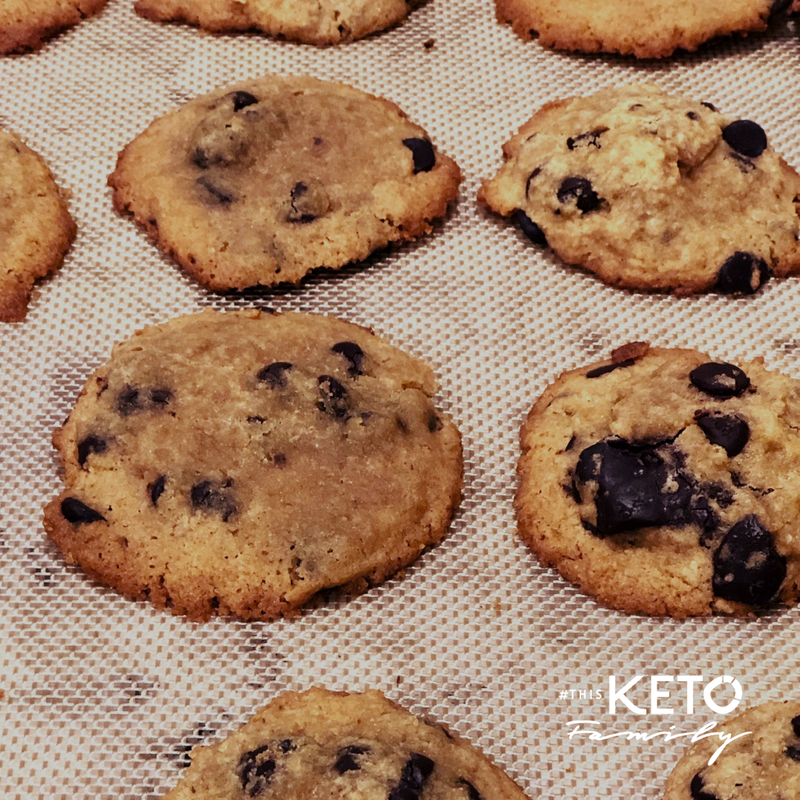
Who doesn't love chocolate chip cookies? I know the first things I craved to learn to master when I transitioned into keto was keto desserts. I mean if I was going to make this a lifestyle, my new keto life better include some delicious desserts. This was one of the first desserts I worked to master. The secret? The brown-butter and coffee! These two ingredients really make a different in the flavor profiles of these cookies. If you've tried other recipes that were so-so, then you need to try this one. It will not disappoint! Also, I suggest making the entire batch, getting them all mixed and freezing them. Then you can pop a few in the oven anytime you need a cookie fix. Or better yet, make mini frozen cookie doughs (about half the size of a normal cookie portion) and eat is as a keto fat bomb straight from the freezer. Yup! You know I do that LOL. Ingredients: 1 cup almond flour 1/4 cup + 2 tablespoons coconut flour 1/4 teaspoon xanthan gum 1/4 teaspoon salt 1/2 teaspoon baking soda 1/2 teaspoon baking powder 1 cup Kerry Gold butter, browned (see steps 1-2) 1/4 cup Swerve Brown 1/4 cup Swerve 1 teaspoon vanilla 2 teaspoon coffee (optional) 1 egg + 1 egg yolk 1/2 cup Lily's dark chocolate chips 3 oz dark chocolate, roughly chopped (adds texture and visual aesthetics) Directions:
Follow us on Social Media | Did you try the recipe? Tag us! @thisketofamily This Keto Family is a participant of the Amazon affiliate marketing programs, which means we may get paid commissions on editorially chosen products purchased through our links to retailer sites.
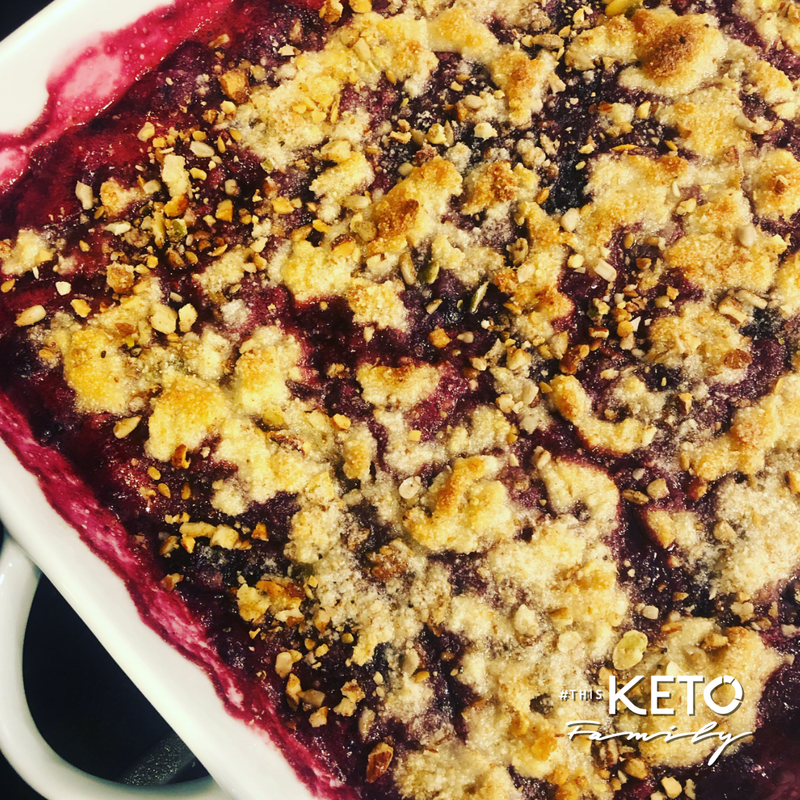
So it has been said that summer hasn't started yet until a good cobbler pie is made, haha. My general philosophy is that there is always room for a good cobbler. The keto berry cobbler recipe is a great one that even non-keto guests would enjoy.
Use fresh or frozen berries of your choice. Thicken it up and then top it off with a almond flour crumble. Bake it until its golden and bubbly and serve it with a side of Keto ice cream! A yummy fruit dessert that is keto friendly and delicious. Ingredients–Berry Filling: 16 ounces fresh or frozen berries Xanthan gum slurry* 1/2 lemon , juiced 2/3 cup allulose sweetener pinch of salt Ingredients–Topping: 1 cup almond flour 2/3 cup Swerve sweetener 4 tablespoons butter 1/4 cup Highkey granola (optional) *Ingredients—Xanthan Slurry: 3 teaspoons coconut oil (or avocado oil) 1 teaspoon xanthan gum Directions:
USE OUR FAVORITE BRANDS + PRODUCT
Follow us on Social Media | Did you try the recipe? Tag us! @thisketofamily
This Keto Family is a participant of the Amazon and other affiliate marketing programs, which means we may get paid commissions on editorially chosen products purchased through our links to retailer sites.
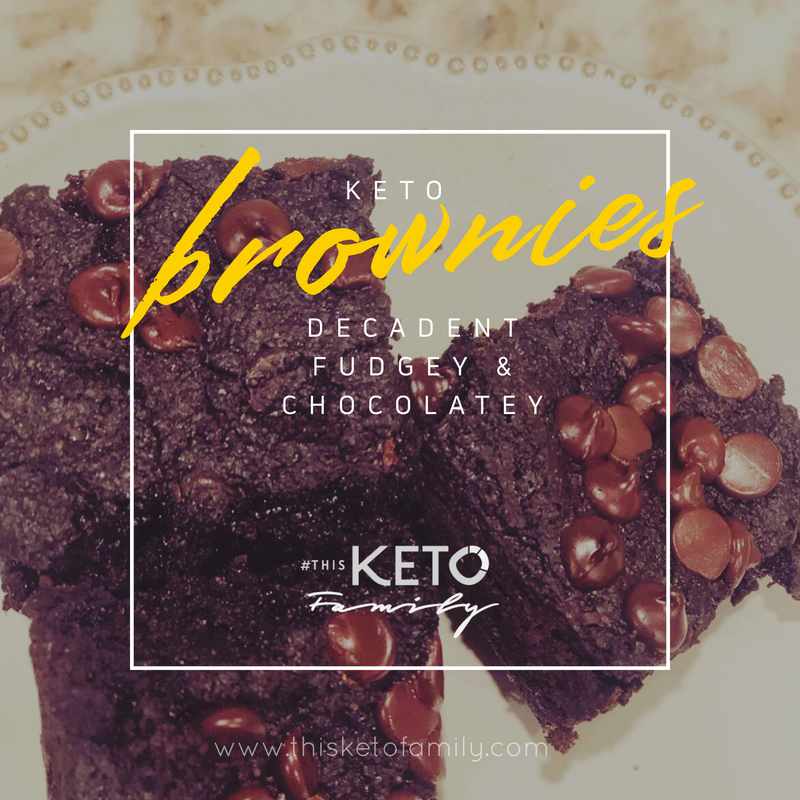
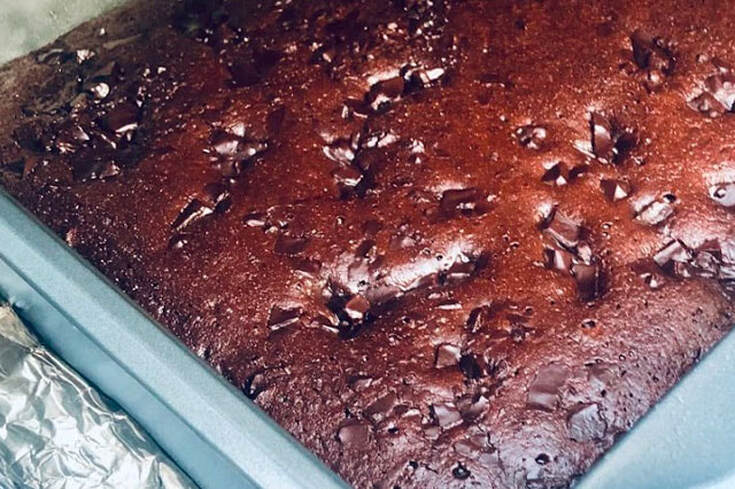
Brownies have a way to making things better. They're warm and gooey and so comforting. Most baked Keto goods are either too eggy or too dry and many keto brownie recipes online fall short — but not this one. If you are searching for a rich, dark, fudgy, chocolatey Keto dessert, then this is for you. I decided to use black cocoa powder for a rich, dark flavor and color. The chocolate chips inside the batter and on top of the brownie offer a nice contrast in color and enhancement of flavor. So what you may ask gives this decadent dessert its fudgy middle? An extra egg yolk. That's it. This recipe is super easy and comes together in under 20 minutes (including bake time). Try to resist eating it right out of the oven. As with any keto baked good, you need to let the item rest and set for at least 15 minutes. Difficult I know, but the wait is worth it—I promise! Ingredients: 1.5 cups almond flour 1/2 cup black cocoa powder 1/2 cup allulose sweetener 1/4 teaspoon xanthan gum 1/4 teaspoon salt 1 tablespoon baking soda 1 egg, plus 1 egg yolk 3/4 cup coconut cream (or heavy whipping cream) 1/2 cup Lily's chocolate chips, divided Directions:
Follow us on Social Media | Did you try the recipe? Tag us! @thisketofamily This Keto Family is a participant of the Amazon affiliate marketing programs, which means we may get paid commissions on editorially chosen products purchased through our links to retailer sites.
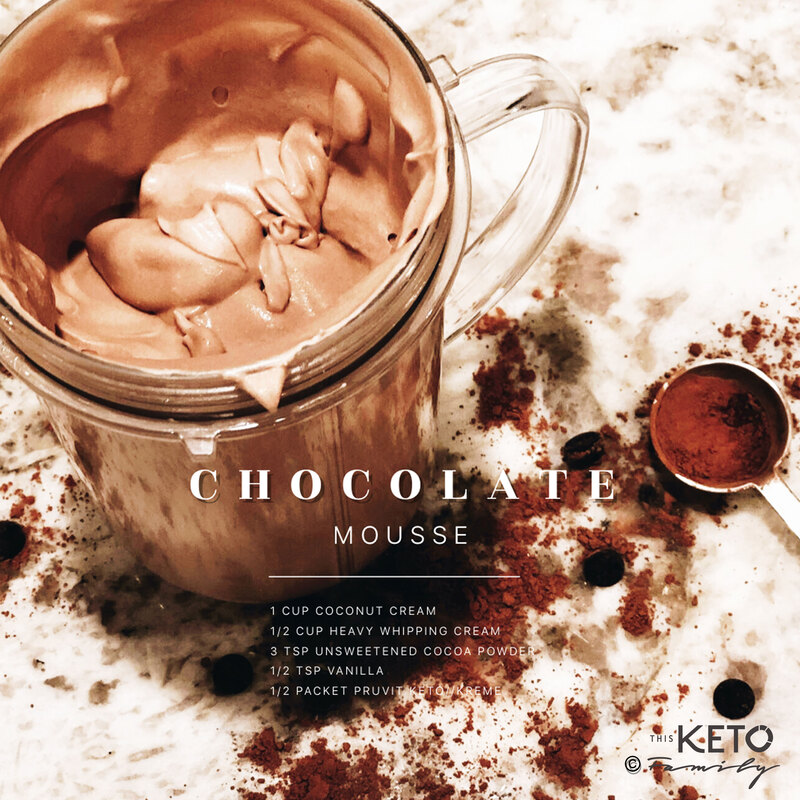
When you have 3 young kids speed is the name of the game, especially after dinner and when dessert is involved haha! I love the versatility of this dessert which can be eaten as is as a light and airy chocolate mousse or can be a nice filling to a quick chocolate mouse crepe. Top it off with some strawberry slices and a dusting of Swerve confectioner's sweetener and it's a dessert no one wants to miss. Everyone in family loved this. It's not too dense and its lightly sweet. I decided to use Pruvit Venture's Keto//Kreme packet for this recipe for (1) all the good MCT oils and fats and (2) simplicity. I already new the Keto//Kreme tasted good, so why not use it in a dessert. I love sharing the recipe to my 10-Day Challengers because its a simple dessert that satisfies any sweet tooth craving. And since its high in healthy fats, it will leave you feeling satiated for a long time. Serving Size: 2 Ingredients: 1 cup coconut cream** 1/2 cup heavy whipping cream 3 teaspoons unsweetened cocoa powder 1/4 teaspoon vanilla extract 1/2 packet of Pruvit's Keto//Kreme **If you sub out the coconut cream with unsweetened Almond milk, and warm it on the stovetop, you can have a yummy, creamy chocolate milk. Directions:
Need more info on Keto//Kreme? Contact me for more information. Follow us on Social Media | Did you try the recipe? Tag us! @thisketofamily This Keto Family is a participant of the Amazon affiliate marketing programs, which means we may get paid commissions on editorially chosen products purchased through our links to retailer sites.
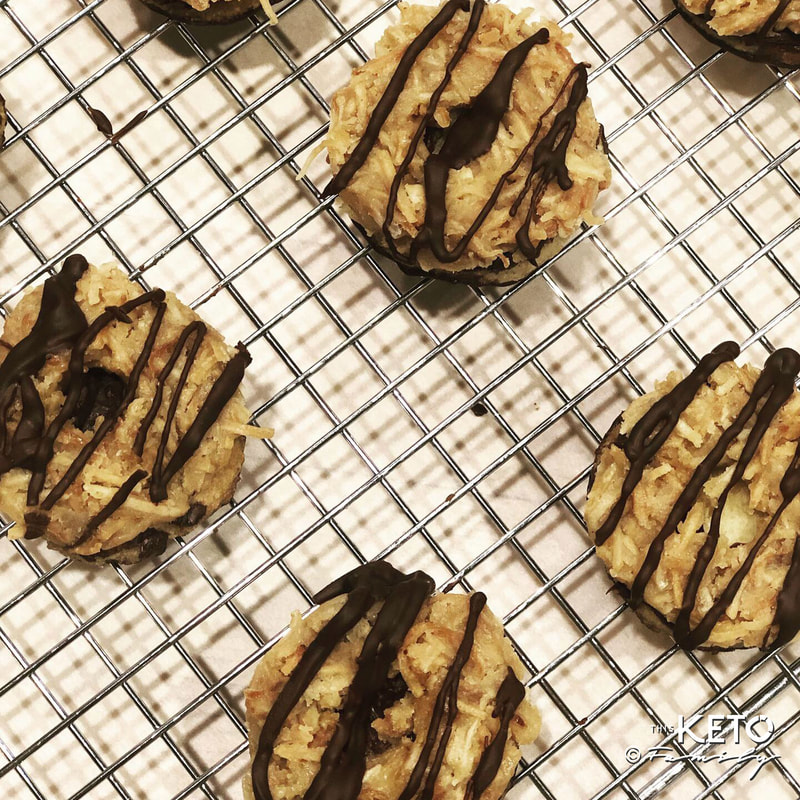
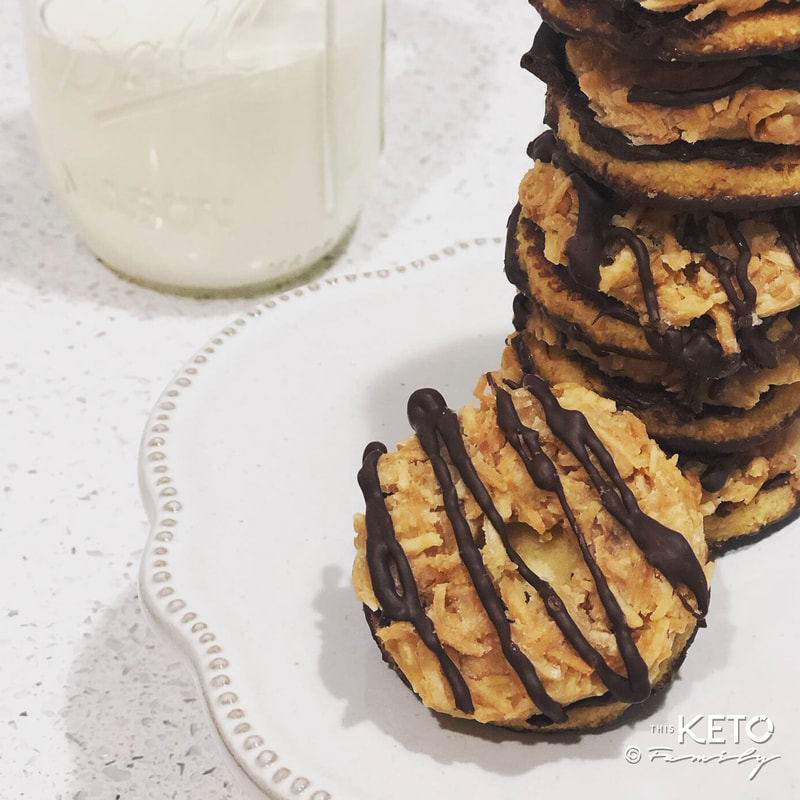
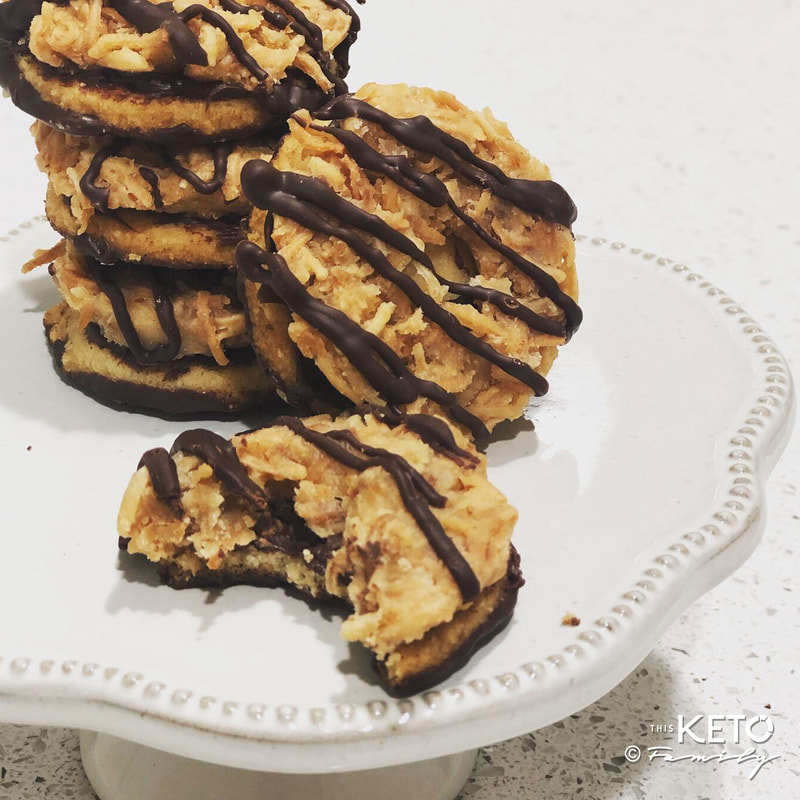
If you are like me you love yourself some yummy girl scout cookies. My all time favorite? The Samoa cookies. Given that there are girl scouts at every super market corner these days, I thought it only fitting to ketofy this cookie. Afterall, shouldn't everyone get a chance to experience some of this deliciousness without the guilt of carbs and sugars? Keto and low-carb friends rejoice! This version has the flavor, texture and taste that rivals the original with far fewer carbs. Plus because I used unsweetened shredded coconut, there is only a minimal amount of naturally occurring sugar/carbohydrates. ONE 'normal' Samoa girl scout cookie will set you back 9grams of Carbs with 5g of sugar. My copycat Keto Samoa cookie is only 0.5g of Net Carbs and 0g of sugar! Ingredients: *Cookie Base: Follow my Shortbread Butter Cookie Recipe *Caramel: Follow my Keto Caramel Sauce Recipe 1.5 cup unsweetened shredded coconut 3/4 cup Lily's dark or semisweet chocolate morsels 3 teaspoons coconut oil Directions:
This Keto Family is a participant of the Amazon affiliate marketing programs, which means we may get paid commissions on editorially chosen products purchased through our links to retailer sites.
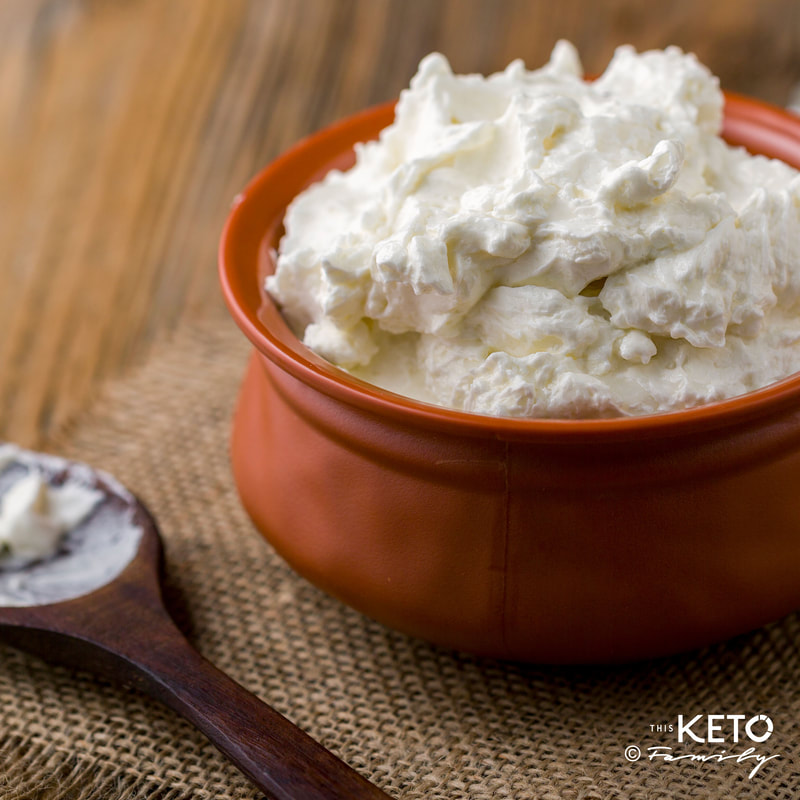
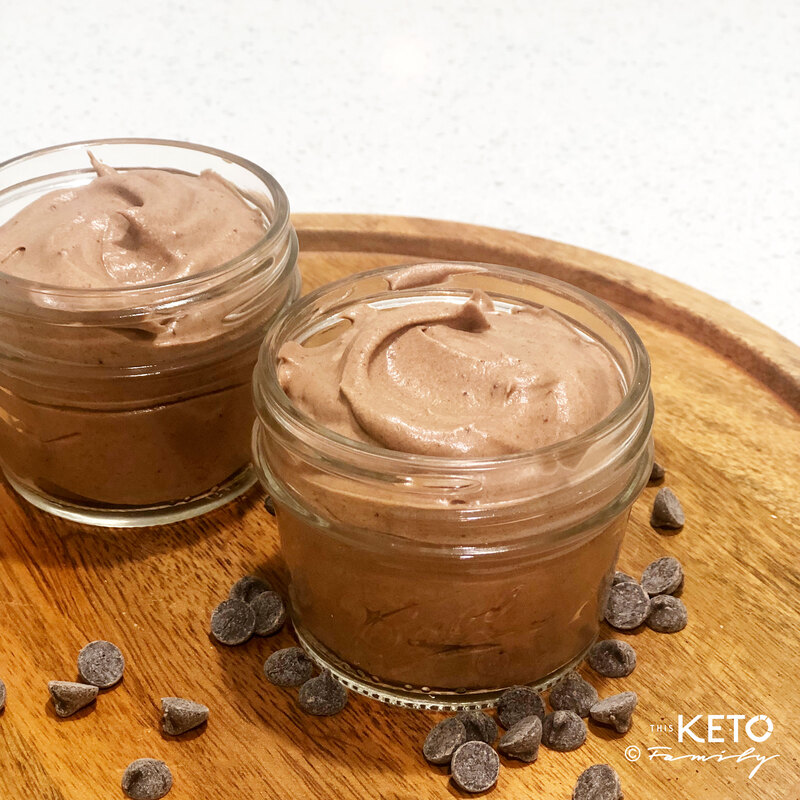
This super simple Keto Chocolate Mousse recipes has only 5 ingredients and comes together in under 5 minutes! Eat it as is (you know I did haha), or dress it up with a dollop of whole-fat whipped cream and some raspberries.
Ingredients: 1 can coconut cream (I recommend this one) 3 tablespoons Swerve confectioner's sweetener 1/4 cup unsweetened bakers cocoa (I recommend this one) 1/4 cup dark chocolate, melted (I recommend this one) 1/2 teaspoon vanilla extract Appliances/Tools: Handheld electric mixer Directions Cake:
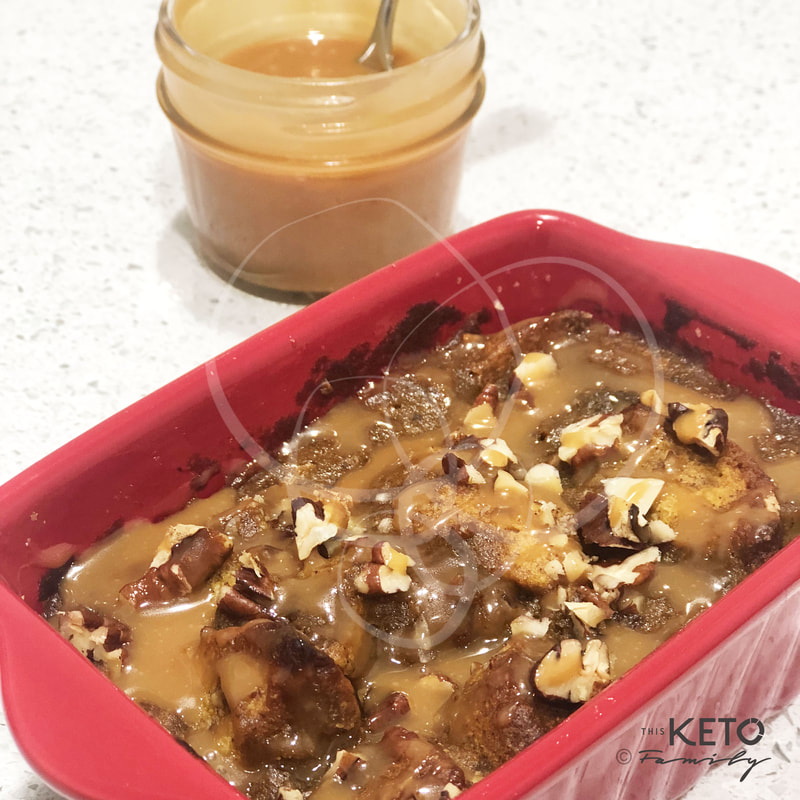
Look no further folks – this is THE Cadillac of Keto Thanksgiving desserts. If you are a bread pudding lover like me, then you've reached the holy grail. Once I perfected my Keto Bread Roll recipe, the keto dessert possibilities just opened up—and well, since Thanksgiving is just around the corner, I decided this would be the first of many keto bread puddings I will be making.
Top this baby with vanilla ice cream (We love Rebel in our home) and my Keto Caramel and you have a winner. I guarantee even the non-keto eaters at your Thanksgiving table will start considering a keto lifestyle with this dessert! LOL We hope you try this recipe and love it as much as we do. Ingredients: 1 pound Keto bread (See my Keto Bread Roll recipe. You will need to make 2 batches make a 9x9 dish) 4-8 oz Keto Carmel (See my Keto Caramel recipe here) 1/4 cup pecans, chopped (optional) Keto Pumpkin Pudding Filling: 1 cup heavy whipping cream 1 cup half and half (or do 2 cups of heavy whipping cream) 1 15-oz can pumpkin puree 1 cup allulose sweetener (I recommend this one) 4 large eggs, room temperature 4 tablespoons grass-fed butter, melted 2 teaspoons vanilla 1 tablespoon pumpkin spice Directions:
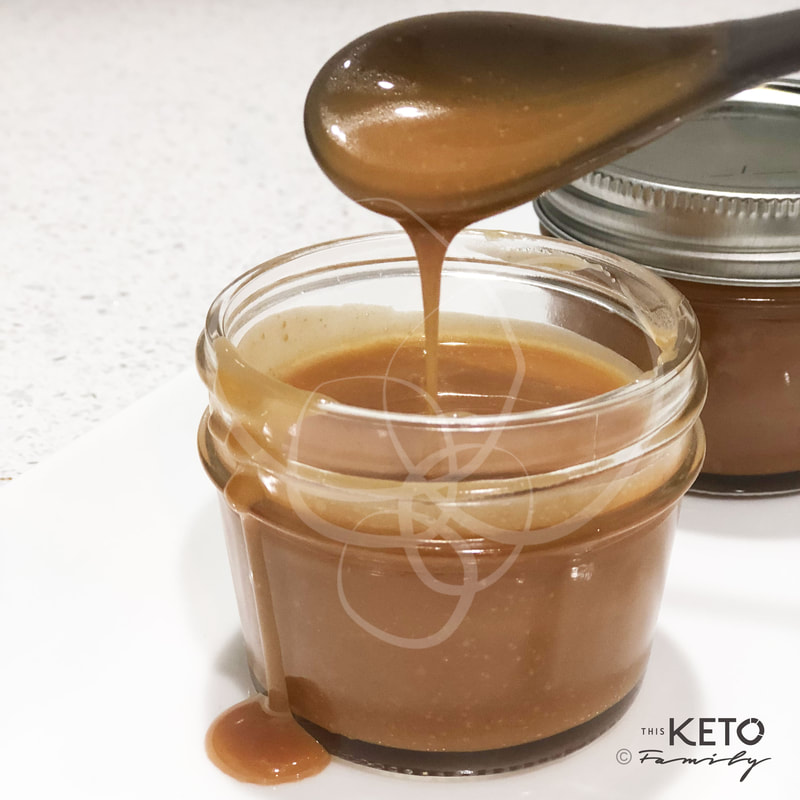
TO DIE FOR! This keto caramel sauce is AH-MAZING and will now become a staple in our house for anything sweet. Use it on top of ice cream, swirled in your coffee for a caramel macchiato or just eat it with a spoon LOL! The key to deep flavor and the golden color is browning the butter. Be patient while the butter melts and the fat solids separate and brown. This gives off a nutty flavor that is the make-it or break-it. It separates a good sauce from a great sauce. It takes time, but if you do it, you will thank me. Let me know how yours turns out. This recipe makes about 8oz of caramel sauce. Unless you eat it out of the pot ;-) Ingredients: 6 tablespoons Kerrygold butter 1/2 cup heavy whipping cream 1 teaspoon vanilla extract 1 tablespoon Keto//Kreme* (or mct powder, NOT mct oil) Pinch sea salt 1/4 cup xylitol sweetener (I recommend this one) 1/4 cup Monkfruit sweetener Directions:
*This Keto Family is an independent Pruvit distributor. Keto//Kreme is a product of Pruvit Ventures and can be purchased on their website. What is Pruvit? Click here to learn more.
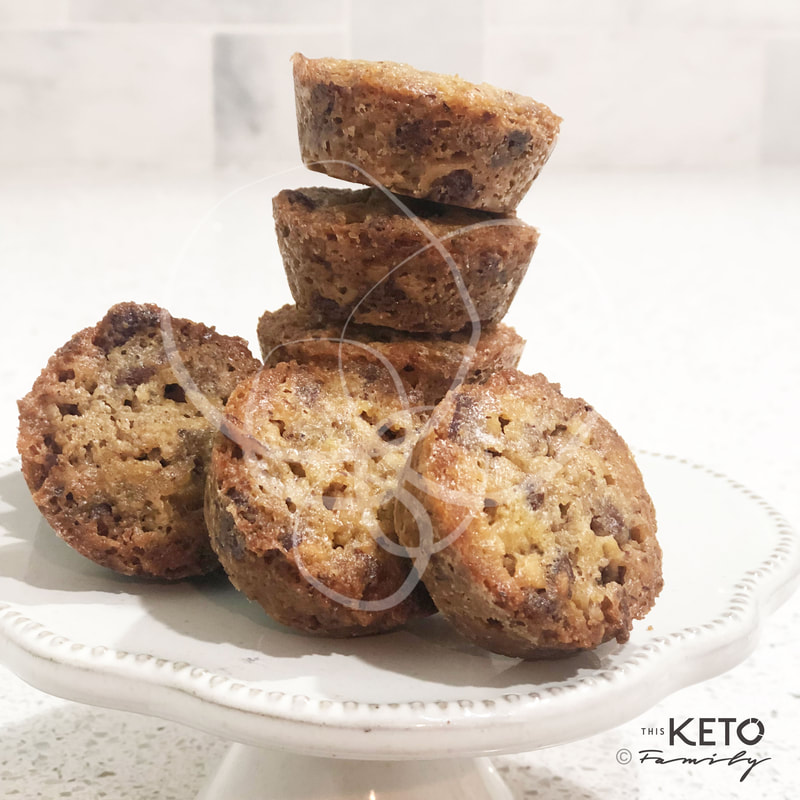
This Keto Family is a participant of the Amazon affiliate marketing programs, which means we may get paid commissions on editorially chosen products purchased through our links to retailer sites. Thanksgiving is just around the corner. If you're looking to add another keto dessert option to your table, then these min praline bites are just the ticket. At only 0.5 net carbs for each little bite, you can have your keto pumpkin pie as well as a few of these babies.
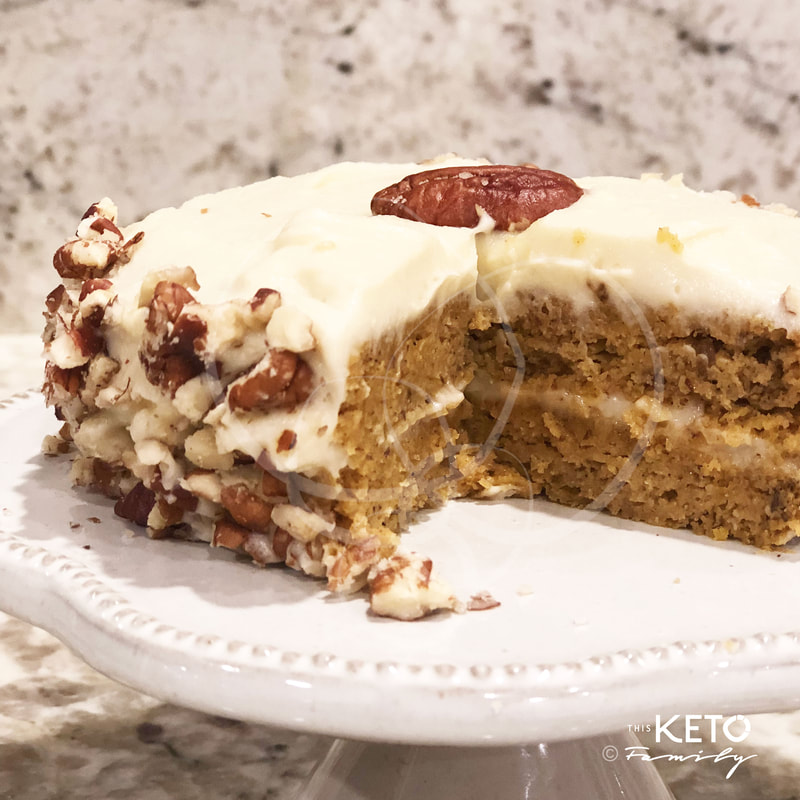
Makes 36 mini praline bites Ingredients: 1 1/2 cups pecans (chopped) 1 cup Monkfruit Golden 25 grams coconut flour (I recommend this one) 1/2 cup melted butter 1 tablespoon gelatin, grass fed (I recommend this one) 3 large eggs, lightly beaten Appliances/Tools: Mini cupcake tray** (This is what I used) **It is KEY that you use a light colored mini cupcake baking tray to get the crunchiness and caramelization of the ingredients. Directions: Preheat the over for 350° . In a medium sized bowl, combine all dry ingredients. Set it aside. In a separate large bowl, cream the melted butter and sugar. Add eggs one at a time combining thoroughly. Fold in dry ingredients. Then add the crushed pecans. Fold being careful not to over-mix. Prepare your baking tray by spraying it with non-stick coconut oil or almond-oil. Or take a small amount of coconut oil on a clean towel and generously coat the wells of your baking dish. Pay close attention to the sides (Otherwise your praline bites won't come out!! haha) Bake 20 minutes. Cool in the baking pan for 5-10 minutes until firm. Use a butter knife to loosen the sides and remove them from the tray. Finish cooling on a baking rack. PRO TIP: Store these babies in a sealed container up to 5 days on the countertop. When you want to enjoy one thats a day or so old, quickly warm it in the microwave for 5 seconds. ENJOY! This keto pumpkin bread recipe is really versatile. Use it as a base for a pumpkin bread loaf, pumpkin muffins or even mini individual-sized pumpkin cakes. Its a perfect addition to your fall, Keto Thanksgiving spread and is sure to satisfy even your non-keto guests.
Makes 3 two-layered mini cakes Ingredients: 1/3 cups coconut flour (I recommend this one) 1/2 cup Swerve sweetener 2 tablespoons ground psyllium husk (I recommend this one) 2 teaspoons baking powder 1/4 teaspoon salt 1 teaspoon pumpkin spice 3 large eggs, lightly beaten 1/2 cup + 1 tablespoon pumpkin puree 2 teaspoons vanilla extract 3 tablespoons Kerrygold butter, melted Cream Cheese Frosting: 8 ounces cream cheese, softened 1/2 cup Kerrygold butter, softened 2 teaspoons vanilla extract 2 cups Swerve confectioner's sweetener Decorations (Optional): 1/2 cup pecans, chopped Appliances/Tools: Silicon baking tray (This is what I used for this recipe) Handheld electric mixer Directions Cake:
Come on, let's face it. The reason diets don't last very long is that most people can only deprive themselves of certain foods for so long. And the reason Keto IS SO SUSTAINABLE is because you DON'T deprive your body of the fats and richness that it so needs.
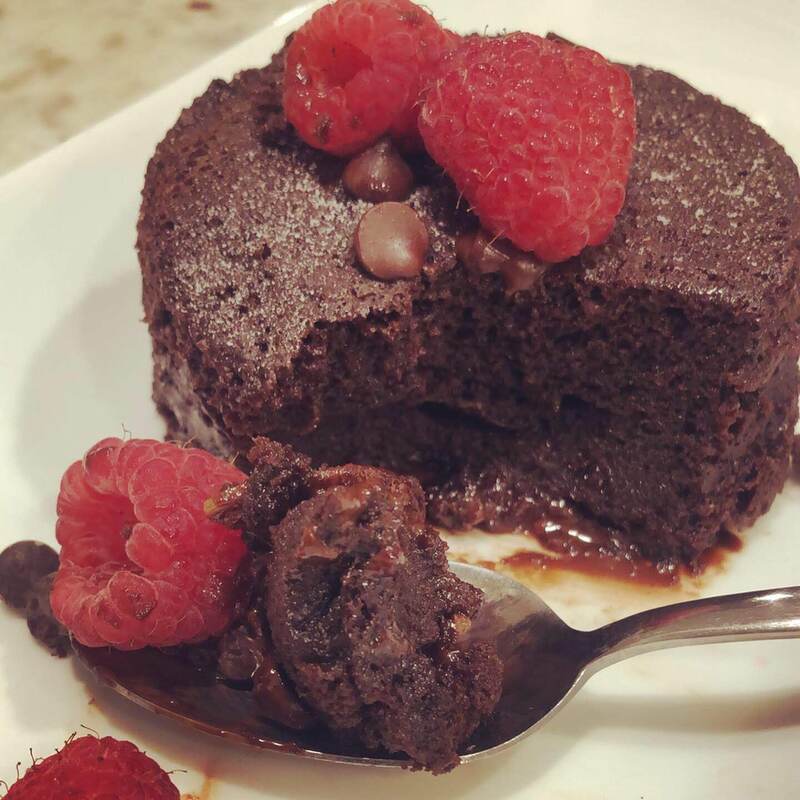
Brownies are a great way to tame your sweet tooth without the guilt of the traditional carb-loaded kind. And if you are a woman, that sweet tooth comes a knocking every 28 days. Ingredients: 1/2 cup Kerrygold butter, melted 2/3 cups Swerve sweetener 3 large eggs 1/2 teaspoon vanilla extract 1/2 cup almond flour 1/3 cup baker's cocoa powder, unsweetened 1 tablespoon grassfed gelatin (I recommend this one) 1/2 teaspoon baking powder 1/4 teaspoon sea salt 1/4 cup water 1/3 cup dark chocolate chips (I recommend this one) Directions: Preheat the over for 350° and grease an 8x8 pan with coconut oil. Set it aside. In a large bowl whisk together the first four ingredients — melted butter, sweetener, eggs and vanilla. In a separate bowl, combine all the dry ingredients — almond flour, cocoa powder, gelatin, baking powder and salt. Whisk together until combined, breaking up any clumps of flour. Gradually add the dry ingredients mixture to the wet ingredients. Add the water to thin out the mixture. Mix until combined. Spread that batter in the prepared baking dish. Spread the extra chocolate over the top. Bake 15-20 minutes, until the edges are set. The center may be a bit soft. Remove from the oven and cool completely before serving, about 15 minutes. If you are just starting Keto and you were a sugar, chocolate addict like I was then pin this recipe because it will be your lifeline. It was mine! Anytime I needed something sweet or chocolatey this was the jam. With only a 5 minute prep and a 90-second cook time, immediacy was everything when a craving hit in my early days of keto. I used to get so good that I'd remember the measurements by heart. Try this keto dessert for a special night or celebration or really anytime the occasion called for it. For my version I decided to use egg whites because it still combined the ingredients well but offered a less eggy taste. I mean who wants to taste an eggy chocolate cake. If you want to be adventurous, stop the microwave at 30 seconds remaining and stick a piece Lily's dark chocolate bar in the center of your cake (which will still be a little wet). Then quickly turn the microwave back on to finish the cooking. This will get you a yummy lava-cake version that oozes melted chocolate when you cut into the cake. After its been microwave, gently invert the mug over a plate to garnish with a few more chocolate chips or a dusting of powdered swerve and some raspberries! This is a great single-serving side that appease any sweet tooth. Serves: 1 Person Ingredients: 2 tablespoons Kerrygold butter, melted 3 tablespoon almond flour 2 teaspoons unsweetened cocoa powder 1 teaspoon baking powder 1 teaspoon vanilla 1 tablespoon sweetener (I like allulose) 3 tablespoons liquid egg whites Pinch of salt Lily's dark chocolate chips Directions:
Follow us on Social Media | Did you try the recipe? Tag us! @thisketofamily This Keto Family is a participant of the Amazon affiliate marketing programs, which means we may get paid commissions on editorially chosen products purchased through our links to retailer sites.
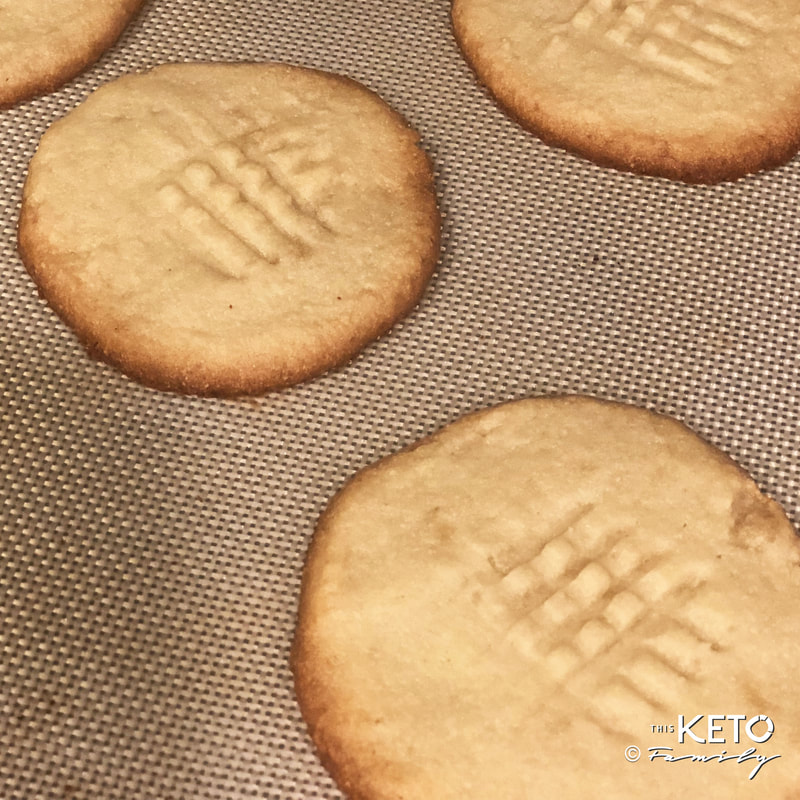
These were one of the first keto dessert items I learned how to make when our family transitioned into this lifestyle. I knew I needed to keep our sweet tooth coffers full in order to get buy in from the kids and hubs (since at that time, I was the only one in the household fully keto). The butter in these cookies paired with the sweetness hits the spot every time. It kind of reminds me of those cookies my grandmother used to have in the blue tin cans. It was shaped like a pretzel but flat and with large sugar crystals on top. These are very reminiscent of those, it's crazy! I normally have a cookie jar filled with these cookies on the countertop just for a quick sweet treat. They are also a great way to up your healthy fats (and with a cookie at that). I'm not a huge fan of keto fat bombs (cold balls of either coconut oil or butter is weird to me), but I can surely eat a butter-filled cookie all day any day. Go figure! This comes together so simply you'll wonder why you've never made them before. (Modified and updated 01/2020) Ar's Notes: After having made these over a dozen time since the post, I've since modified the baking temperature as well as added 1 tbsp of psyllium husk powder to keep the cookie together better. I also highly recommend Monkfruit sweetener over others (Swerve or Allulose). The monkfruit keeps the cookie crisp and doesn't have a cooling effect when you eat it like you get with Swerve. Hope you enjoy! Ingredients: 1 cup almond flour 1 tablespoon psyllium husk powder 3-4 tablespoons grassfed butter, room temperature 1 teaspoon vanilla extract 1/4 cup Monkfruit sweetener Directions:
This Keto Family is a participant of the Amazon affiliate marketing programs, which means we may get paid commissions on editorially chosen products purchased through our links to retailer sites.
|
AuthorHi! I'm Arlene – wife, mother of 3, entrepreneur and keto foodie. I love to make, share and try different, delicious keto food recipes that are easy to make and most-importantly kid-friendly. Life is hard as it is, feeding our families should be easy, fun and nutritious. Archives
December 2020
Categories
All
|
SERVICES |
Recipes |
About |
CONNECT with Us |
©2019-2022 THIS KETO FAMILY ALL RIGHTS RESERVED. | PRIVACY POLICY & DISCLOSURES | CLIENT LOGIN


 RSS Feed